
In this tutorial, you'll learn how to design a billboard in InDesign. You'll also learn about billboard dimensions and other useful tips to create a billboard effectively. At the end, you'll find some awesome creative billboard design templates to use for your future projects.
If you're looking for billboard templates in InDesign and Photoshop or blank billboard templates, be sure to check out Envato Elements. For a small monthly fee, you have access to an extensive library of high-quality assets and unlimited downloads. Be sure to check it out!
Jump to content in this section:
What You'll Learn in This Tutorial on How to Create a Billboard Design
In this tutorial, you'll learn:
- How to make a billboard design in InDesign
- How to calculate the billboard dimensions for InDesign
- How to properly set a file with columns
- How to export a billboard design PDF
What You'll Need for This Creative Billboard Design Tutorial
For this billboard design, you'll need:
- Beautiful facade of house
- Bedroom with beautiful background
- Cozy kitchen in a minimalist style with lots of cabinets
- Apartment in an open style
- House Location logo
1. How to Set Up a File for a Billboard Design in InDesign
Step 1
To decide on the billboard dimensions for InDesign, it's important to understand the basics. It's always a good idea to call the printing house where you'll be having the billboard printed to learn the standard billboard size.
As a rule of thumb, each foot is equal to an inch. That means that if the final standard billboard size is 12 ft x 24 ft, the InDesign file size will be 12 in x 24 in.
The file also needs to have no bleeds and a safe area of 1/4 ft or 0.25 in.


Step 2
Head over to InDesign, and create a New Document. Set the Width to 24 in and the Height to 12 in. Set the Margins to 0.5 in.
Click Create.


Step 3
Go to Layout > Create Guides. In the Create Guides pop-up window, set the Columns Number to 9 and the rest of the settings to 0. Under Options, choose Fit Guides to Margins. Click OK. This way, you'll have the standard billboard size set up, and you can work on that.


2. How to Design a Billboard Template in InDesign
Step 1
Select the Rectangle Tool (M) from the toolbar. Create a rectangle that fits the width of the billboard and measures 1.25 in in Height. Set the Color to #223970.
Place the rectangle at the bottom of the billboard. This will help us create an overlapping effect.


Step 2
Select the Rectangle Frame Tool (F) from the toolbar.
Create a rectangle that starts from the fifth column and the very top edge of the billboard to the bottom margin and the far right edge.


Step 3
Find the Facade of House file that you downloaded onto your computer. Drag it into the frame we created in InDesign.


Step 4
Select the Direct Selection Tool (A) and click on the image within the frame. This allows you to move the image inside the frame, rather than the entire frame.
Go to the Options bar, and set the Height and Width to 110%.


Step 5
Select the Text Tool (T) from the toolbar. Create a text box on the top-left corner of the billboard.
Add the text "Luxury Renovated Homes for Sale" in all caps.


Step 6
Open the Character panel by going to Window > Character.
Set the Font to RNS Sanz, set the Size to 75 pt and the Leading to 70 pt.
Set the Color to #223970.


Step 7
Select the Rectangle Frame Tool (F) from the toolbar.
Using the Options bar, create a rectangle with a Width of 3.2 in and a Height of 2.5 in.


Step 8
Locate the House Location logo file on your computer. Drag the file into the frame we created in the previous step.
Use the Direct Selection Tool (A) to move and resize the logo.


Step 9
Select the Text Tool (T) from the toolbar. Create a text box under the logo and add the text "Offer Price: $4.2000,00" in all caps.


Step 10
Press Command-B to open the Text Frame Options pop-up window. There, set the Inset Spacing to 0.25 in.
This will help create a margin around the text so it isn't flush to the edge.


Step 11
Using the Character panel, set the Font to RNS Sanz Bold and the Size to 35 pt.
On the Options bar, set the Color of the text to White. Set the Color of the textbox to #ffb11c.


Step 12
On the Options bar, set the Stroke Color of the textbox to White.
Set the Stroke Weight to 9 pt.


Step 13
Create a new text box using the Text Tool (T) that fits the first four column guides. Place it under the big text.
In this text box, add contact information and the home's special features.
Using the Character panel, set the Font to RNS Sanz Extrabold and Semibold and the Size to 28 pt.


Step 14
Press Command-B to open the Text Frame Options pop-up window.
Under Columns, set the Number to 2 and set the Gutter to 0.28.


Step 15
Create another text box with the Text Tool (T). In this box, add a direct phone line.
Using the Character panel, set the Font to RNS Sanz Bold and the Size to 45 pt.


Step 16
Select the Rectangle Tool (M) from the toolbar.
Create a perfect square that has a Width of 3 in and a Height of 3 in.
Place the element at the bottom right corner of the billboard design.


Step 17
While selecting the square element, go to Object > Corner Options.
On the Corner Options pop-up window, set the top right and bottom left Corner Size to 0.5 in and the Shape to Rounded.


Step 18
In the Options bar, set the Stroke Weight to 8 pt and the Stroke Color to White.


Step 19
Duplicate the square by selecting the element. Press Option to Duplicate and Shift to Maintain the same x-axis and drag toward the right.
Repeat this step one more time.


Step 20
Find the three interior images: Bedroom With Beautiful Background, Cozy Kitchen in Minimalist Style, and Apartment in an Open Style.
Drag each image into each of the elements we created. Use the Direct Selection Tool (A) to resize the images.


3. How to Export a Billboard Design PDF File
Step 1
To export this billboard to print, go to File > Export.
Under Format, select Adobe PDF Print.
Click Save.


Step 2
In the pop-up window, set the Adobe PDF Preset to Press Quality.
Click Export.


That's It! You Learned How to Make a Billboard in InDesign!
In this tutorial, you learned all the ins and outs of how to create a billboard design. From this tutorial, you can also have an InDesign template with a standard billboard size to reuse. Designing for large scale has its own challenges, and in this tutorial you learned how to design a billboard template that's basic and versatile.


Design a Billboard With Premium Templates From Envato Elements
If you're unsure of how to make a billboard, don't worry. Envato Elements is the place to go for InDesign billboard templates. For a monthly fee, you have access to high-quality assets and unlimited downloads for your projects. We compiled a small collection of their InDesign templates for designing a billboard. Let's take a look!
Travel Tour Billboard Templates (PSD)
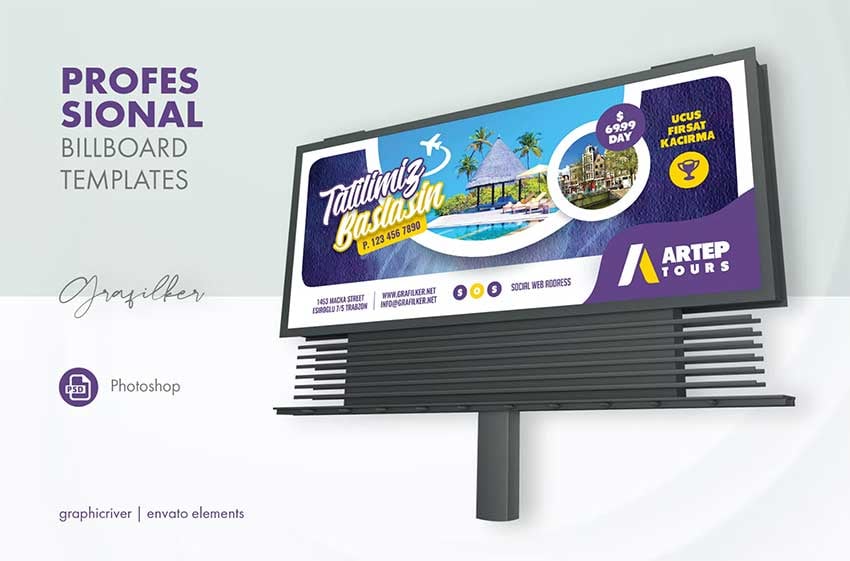


If you're looking for billboard design ideas or if you're running out of time, this is an awesome billboard template. The design is dynamic, strong, and colorful. The file is layered and easily editable.
Shop Billboard Template (AI, EPS)


This creative billboard design is perfect for a clothing brand. The file comes as an empty billboard template, and you can easily add your content. The pack comes with two files for Illustrator and Photoshop, so you can use whichever software you're more comfortable with.
Corporate Billboard Template (PSD)


This corporate and creative billboard design is perfect for all your needs. The layout is versatile, so you can use it for more than just corporate design. The pack comes with two different color variations so you have options for your end design.
Real Estate Billboard Banner Template (PSD)


This is a great billboard design idea if you're looking at the real estate market. This billboard template is perfect for showcasing multiple images and awesome for events. The pack comes with three different colors of a blank billboard template for you to choose from.
Covid-19 Vaccine Billboard Landscape (AI, EPS, PSD)


This billboard template is suitable for professional businesses. Use it as a marketing promotion and company profile on the streets. The pack comes with a ready-to-print and easily editable file.
Find more design ideas and other templates:

 42 Best Billboard Mockups (+Free Billboard Templates Online)


 22 Best Billboard PSD Mockups (Signage & Outdoor Advertising)


 21 Best Phone Grip Mockups (Using a Phone Grip Mockup Generator)

 44 Best Outdoor Fonts (Rustic, Vintage, and Modern Fonts to Download)

 40+ Best Breakfast and Brunch Menu Templates (Restaurant, Hotel, Bridal, and More)

 46 Best White T-Shirt Mockups (Using a T-Shirt Mockup Generator)

 How to Create a Custom Event Roll-Up Banner


 How to Make a Poster for an Event (Using a Template)


