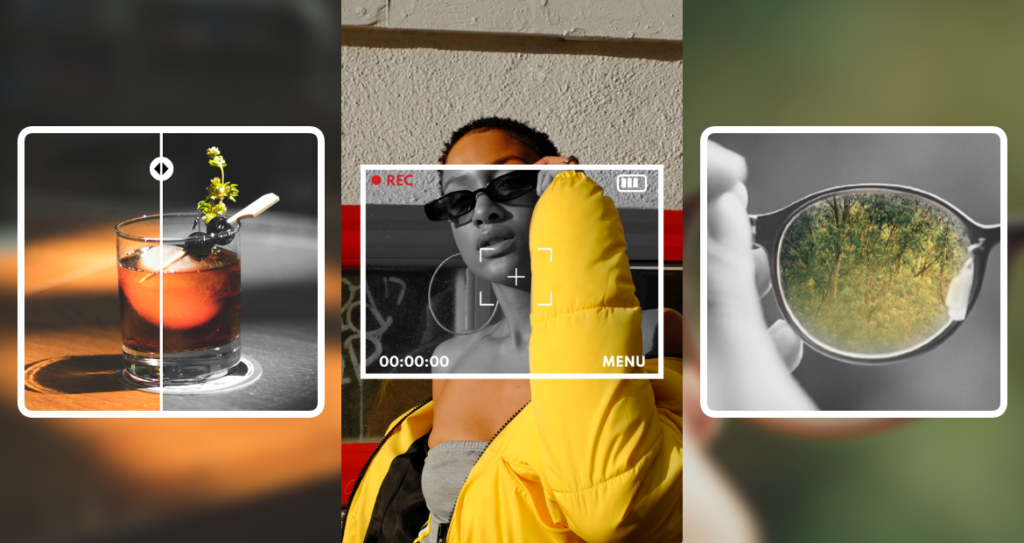
What is a color splash effect?
True to its name, the color splash effect is an image editing trick that transforms full-color photos into black and white, with a dash of colors left usually to emphasize its main subject. This artistic decision can be done either to elevate your portfolio, to beautify your social media feed or simply to dramatize your favorite images. Either way, this editing tip is becoming more popular among photo editors, and if you are interested on how to achieve it, keep on reading!
Color splash in photography
Color is an integral element in the photography field – mainly as they are often used to highlight the focal points of the image. With the color splash effect, a certain color is retained on selected parts of the image. This decision must be made deliberately and wisely, as they are meant to direct the attention of the viewers to the colored parts due to the apparent contrast.
If you are an avid photographer, you might have seen this editing trick on gallery exhibits, social media ads, or even product images. Oftentimes, photographers will first convert their original colored images into black and white while emphasizing certain parts with vibrant hues. However, they can simply add vibrant colors to vintage-styled, black and white images to make it all the more attention-grabbing.
Who can use the color splash effect?
Fortunately, just about anyone from any background can start implementing this cool editing trick onto their images. Regardless of your purposes – whether it is for promoting your products online, growing your follower base, or simply to reach wider audience using your unique brand presence, the color splash effect is your tool to achieve standout visuals.
With Pixlr‘s simple yet intuitive interface, rest assured that you can achieve this effect with ease. Our AI-powered tool can let you choose between black and white, and sepia, with colors retained on selected parts of your images. Whatever you creative vision is, Pixlr is here to help you instantly realise it and create stunning images with the color splash effect.
For more creative inspiration on how to use the effect, see below.
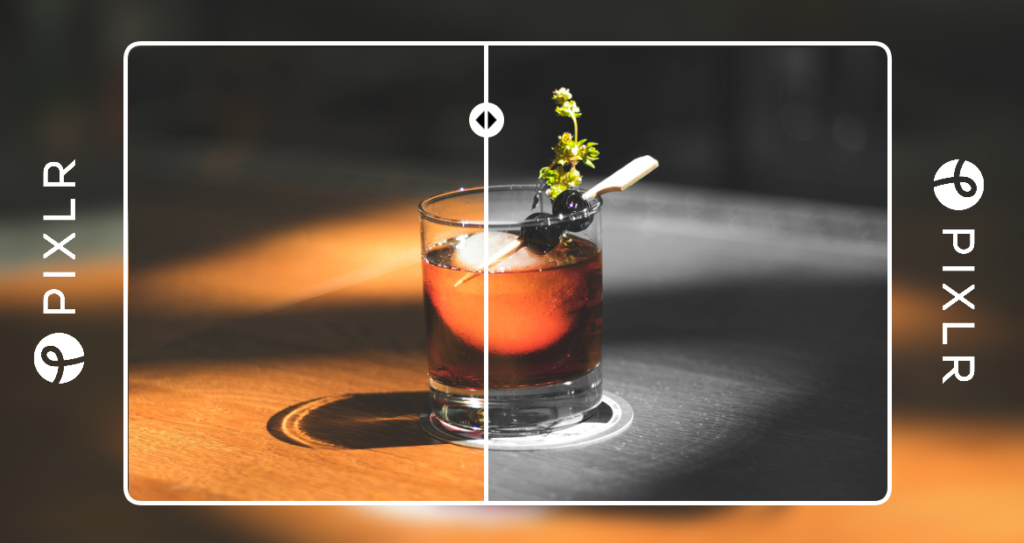
1. Instantly upgrade your product pictures
With the color splash effect, you can avoid distractions by muting your background’s colors to highlight certain features of your product. Think of the most innovative, ground-breaking, unique selling points of your products, and proceed to retain the color on said parts to really showcase them to your audience.
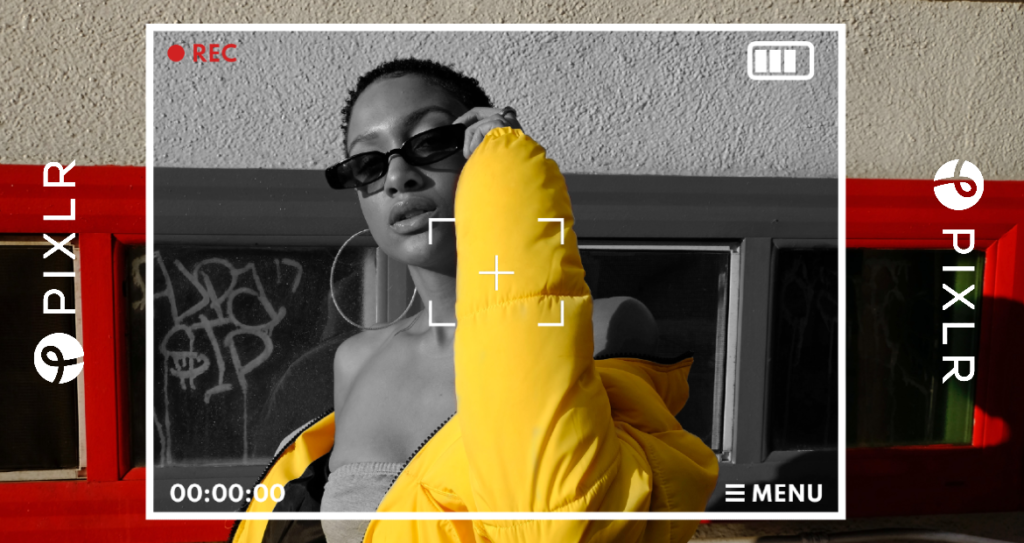
2. Make your selfies stand out against boring backdrops
The color splash effect is a foolproof way to assert your personal branding online. You can adopt it to emphasize the best features of yourself, be it the outfit you wore, your hair, or perhaps your accessories. Turning your selfies’ background black and white ensures that your audience’s eyes would not stray from the important parts of your self-portraits as the visual noise is muted.
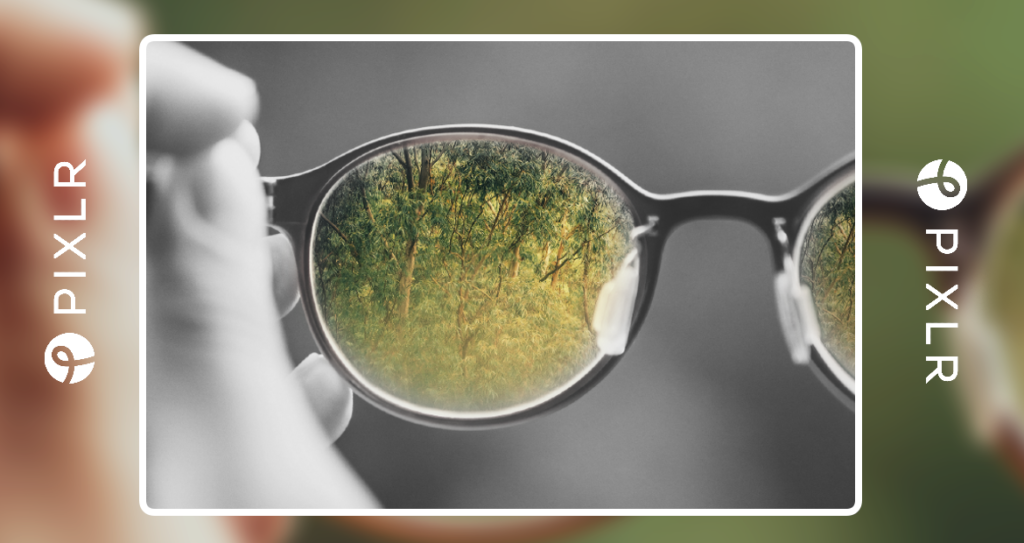
3. Turn your Insta feed into a minimal masterpiece
Minimalism is the current ongoing trend within the design world for years now. Though there are many ways you can achieve this look, color splash is one of the surefire ways to do so. This effect helps you create a curated feed by creating a cohesive, minimalist look for each of your photos. You can highlight certain parts and have the same pattern repeated for each of your posting, turning your social media feed all the more harmonious.
How to achieve the color splash effect with Pixlr
Pixlr E
Within just three steps, you can adopt this trendy editing trick onto your beloved image. First things first, you need to browse Pixlr E and upload an image of your choice by clicking ‘Open Image‘. If you prefer to choose from the millions of stock images that we provide, that can be arranged too. Simply select the ‘Images’ button on the left side panel.
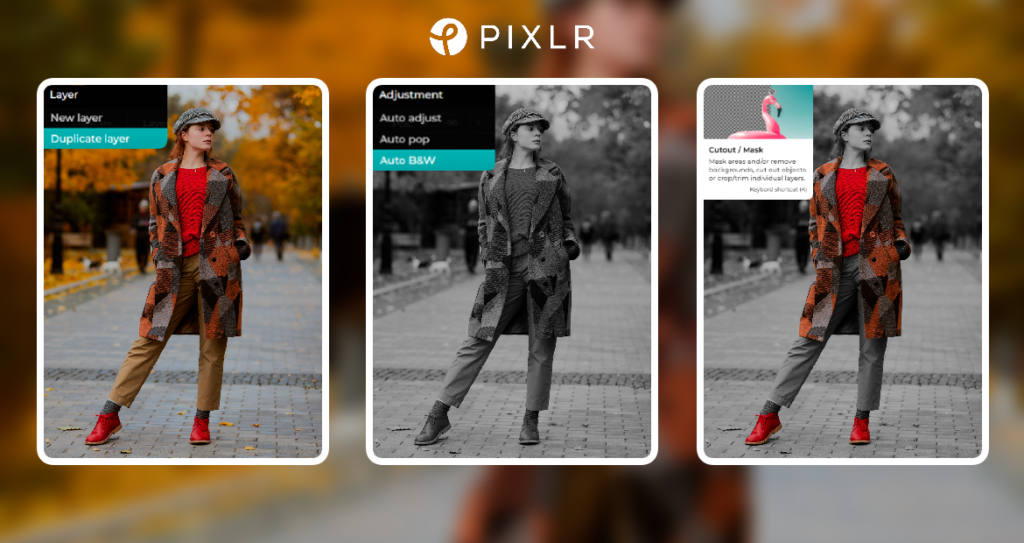
Now, duplicate the image layer. You can achieve this using the shortcut Ctrl + D, or browse the ‘Layers‘ menu on the right side of your screen and click the duplicate icon. Next, go to the topmost panel and find ‘Adjustment‘, which will direct you to ‘Auto B&W‘, this instantly applies the black and white look onto your image.
Finally, utilize the ‘Cutout/ Mask‘ tool to select the specific parts you’d like to be in color. For organic shapes, it is recommended to use the Lasso Mask or the Draw Mask. By masking the certain objects, you can have their colors retained, making them the focal points of the image.
Pixlr X
Same goes with Pixlr X, you can achieve the exact look with only three simple steps. The only difference is that Pixlr X’s interface is catered towards beginners, hence it is simpler and easier to navigate for users.
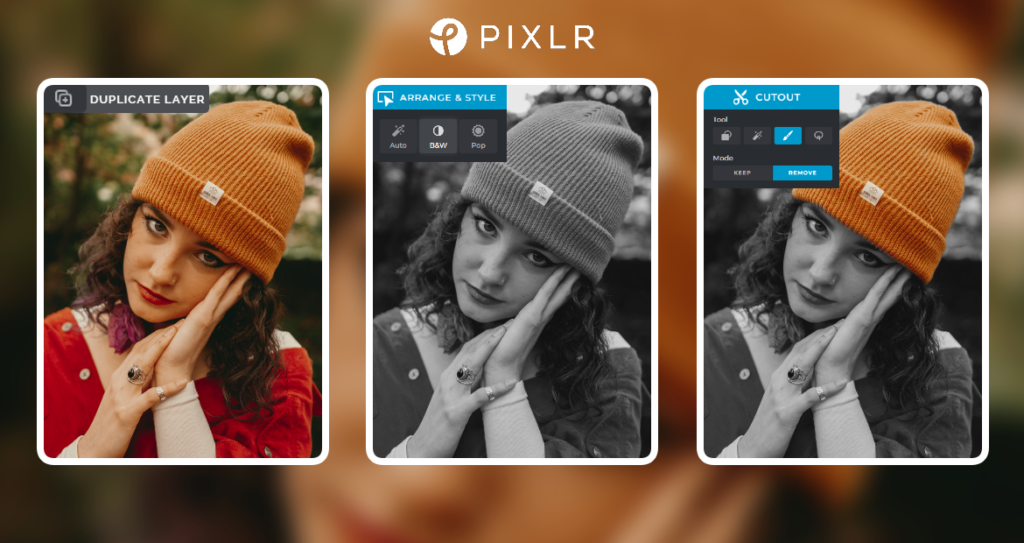
Firstly, you will have to open up Pixlr X, and upload your image. Once you are done, go ahead to the right panel of the screen titled ‘Layers‘. Click on the existing layer and duplicate it.
Afterwards, you can head over to the menu on the left side and find the first icon titled ‘Arrange and Style‘. Then, you’ll find the ‘Adjust‘ icon and can proceed the automatically apply the black and white filter by clicking on ‘B&W‘.
Finally, use the ‘Cutout’ tool, which you can find under the scissor icon. Go ahead and choose among the many different shapes of cutout tools available, from magic to lasso, wand, and draw. Be sure to click on the ‘Remove’ option as you’d like these parts removed, revealing the colored layer underneath. Voilà! you have now achieved the desired color splash effect.
There is no limit on what you can do with Pixlr!
Think of the wildest, most unhinged creative ideas you can come up with for your visuals, and Pixlr will always have your back in making them a reality. The best part is, the platform is catered toward people with both professional editing backgrounds and novices! So give it a try now and browse our pricing page for more information on the subscription plans offered.