
Looking for information on how to start a design blog and make money from it?
Look no further. Here is our step-by-step guide on the best way to start blogging (and how to make money from your blog).

JUST Creative currently makes over five figures a month in passive income, and we want to share our knowledge so you, too, can have a piece of the pie!
According to recent information, there are more than 1.7 billion (yes, billion) websites on the internet, and 500 million of those have blogs on them. That works out to be about 29% of the internet. That means that there is enough room and money out there for you to start your blog and make money.
To help you get your piece of the proverbial money pie, we wanted to create and share with you our comprehensive step-by-step guide to teach you how you can start a design blog and make money from it.
With this guide, you’ll be able to start your blog today in about 10 to 15 minutes and take your first steps into a larger world. So let’s get started!
How to start a design blog (and make money) in 6 simple steps
The ultimate guide to starting a design blog and making money online
- Pick your design blog’s name and niche
- Get your design blog online (web hosting)
- Design your blog
- Write your first blog post
- Promote your blog and get readers
- Make money from your blog
While we’re not big fans of the “ultimate guide” moniker, we have to admit our guide to show you how you can start a design blog and get paid does have an “ultimate” feeling to it. We’ll go over each of these, but for reference or if you want to jump to a specific section, click above.
Disclaimer: **This post contains affiliate links and I will be compensated if you make a purchase after clicking on my links, at no extra cost to you. Your support helps! **
How to start a design blog FAQ

Now, before we start, we understand that some of you may not know what a blog is (Hint: You’re reading one) and that’s 100% ok. Not everyone is an expert at everything and we want to make this as easy as possible for you to get started carving out your little corner of the internet. So to help, we thought it might be good to cover some common questions:
Note: Each section may have a mini-faq section to answer some questions that you’re sure to have
What is a blog?
Well, that’s what you’re reading right now. You see, a blog is a website that is regularly updated with new content written in a conversational or informal style, published frequently that typically has the end goal of attracting new readers and making money online.
Why should I start a blog?
If you’re asking me that question, why are you reading this? Just kidding. Starting and running a blog is one of the easiest and best ways you can start a simple business and make money doing it from anywhere on the planet. This isn’t like being a CPA or a Doctor. You don’t need specialized training or degrees to do this. Anyone can start a blog, and in time, make money doing so.
I’m not a techie, can I still start a blog?
Starting a blog is one of the simplest things you can do online. Even easier than doing your taxes and they’ve made doing those a walk in the park. Compared to previous years, starting a blog has never been easier than in 2020 and because we like you (and you’re reading this article), we’ll go step-by-step to help you create one today.
Can I make money with a blog? Or is this a scam?
No, it’s not a scam. Millions of people around the world are starting to earn more money by working from home rather than in an office at a 9-to-5 job. If you do it right and have patience, blogging can be one of the most profitable online businesses out there. One of the best things is that you don’t have to do it full-time either. Many people, when they first start a blog, will only do it part-time and still earn good money from their blogs. Over time, as your blog grows, there are things you can do to monetize your blog and making even more money (Don’t worry, we’ll go over that)
I’ll bet it’s expensive to start a blog, isn’t it?
In 2020, on average it can cost between $35 and $65 to start a blog. This figure should cover your first year of expenses and the web hosting for your blog will be your biggest expense. Not everything out there you see when setting up your blog is necessary and we’ll go over what you can minimize or even eliminate to help save money.
Ok, questions answered? Still with us? Ok, let’s move forward.
Follow these 6 steps on how to start a design blog and make money today!
Are you excited? We’re excited. You’re about to take the leap and learn how you can start a blog that you can nurture and care for and obsess over and lose sleep over.
We’re only kidding. If you do it right and follow our guide, you can go to bed tonight and not worry one bit.
Here’s our exit!
Step 1: Choose a name for your blog and your niche
Choosing a name for your brand new blog is like choosing the name of your child. Unless you pay to have it changed, you’re gonna be stuck with it for the life of the blog.
When your numerous (fingers crossed) readers log on to your site, it will be the first thing they see so picking something like stinkypoop.com when your blog is about beauty products isn’t going to do a great job of letting readers know what your blog is about.
A good tip is to choose something that represents the topics you’re going to be covering well-designed blog – or you could use your name, the name of your business, or a combination of clever words that make the name of your site stand out.
Your blog’s niche is essentially what your blog is going to be about and what you will end up focusing the majority of your content around. These can be topics that run the gamut from food to fashion, lifestyle, travel, and more. When you decide on a final name for your blog, incorporating a word or two that indicates what your niche is such as foodcaptain.com or technewb.com will help readers in a big way.
I haven’t chosen a name or a niche yet. Is it too late? No, it’s never too late. Relax. If you spend too much time focusing on what to blog about or how to name your blog, just follow this one simple rule.Just. Start. That’s it. Rather than spending hours trying to figure out the perfect name or blog topic, just start. You’ll get better as you progress. The name I want isn’t available, what do I do now? Don’t sweat it. Some hosting companies, like Bluehost, let you choose your domain name later. If the one you had your heart set on isn’t available, don’t worry about it. Just make sure you choose the option to name your site later and get everything else all set you can have more time to think. Getting things done is the name of the game here, not everything has to be perfect. I don’t like the name I chose, can I change it later? No. You’re stuck with it forever. We’re kidding! Of course, you can change the name later, you’ll simply need to buy a new domain name, which isn’t that expensive. While we all want that first domain to be the one that sets us off for the wealth of riches to come, sometimes the name just doesn’t work or you’ve had a better idea.
Step 2: Get your blog hosted
The second step in starting a blog is getting your blog online. It may sound daunting but it’s not as bad as you might think. Getting your blog online essentially means that you’re going to have your website hosted on the internet so other people can find it, read it, enjoy it and follow everything you do for the rest of your life (Just Kidding).
Ok, you in the back of the class, you looked like you had a question:
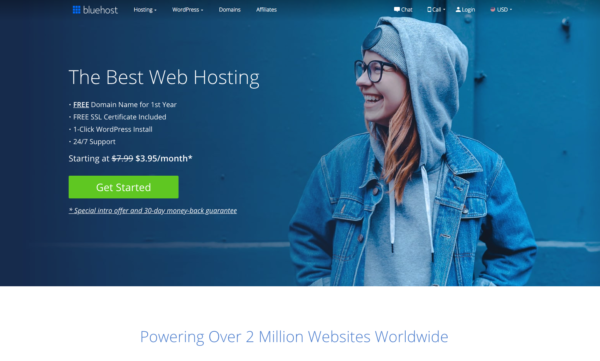
Web hosting? What’s that? Creating a website isn’t enough to get people to come to it and read your blog. It needs to be available to others and to do that, you need a “host”. This “host” keeps everything about your site safe and ensures that someone can see your blog when they type in the URL for your website. Again, this sounds expensive, its gotta be right? It’s more affordable than you would think. High-quality hosting providers like Bluehost offer great deals (around $5/month) and give you a proper host to power your blog which is one of, if not the most important investment you can make when getting started. This site, along with many others out there in the wild, wild web use Bluehost, which is by far one of the best hosting platforms that support WordPress. WordPress has been around since 2003 and is a free publishing platform that powers around 60% of the website available on the Internet.
Bluehost is one of the most reliable, customer-friendly web hosting companies out there today. The combination of WordPress and Bluehost is like a one-two combination from Muhammad Ali so let’s get in the ring champ and set up your hosting.
We use BlueHost ourselves for our clients and can attest to their quality service. We wouldn’t recommend them otherwise, but if you’re looking for web-hosts alternatives check out our post.
Click here to jump over to Bluehost and click the “Get Started Now” button
Choose (wisely) the plan that’s best for you
Ok, so here we go, don’t get scared now.
The first thing you’ll do is pick a plan for hosting your website (naming your little bundle of the world wide web will come next). Out of the options Bluehost offers, we suggest picking the Choice Plus plan. Not only does it come with a cool sounding name but you also get Domain Privacy. This protects your personal information and keeps it from being published online.
To pick your plan, click the green “select” button.
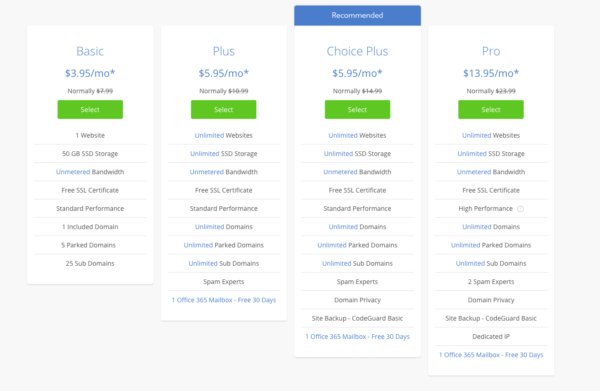
If you’re all about privacy as many of us are these days, the Choice Plus plan is the way to go so that you have access to the Domain Privacy feature to keep your personal information private and out of the wrong hands. This isn’t to say that any of the other plans are worth it. They are, so while we recommend one plan, you should pick the one that suits you best.
Plus, you can still add Domain Privacy later during checkout for about $1/month.
Name your domain
Congratulations on picking a hosting plan! You’re one step closer to having your little corner of the internet. Now, you have to name your new little puppy, and choosing a domain name (also known as a web address) is not always an easy process.
You may think you have a great idea, but someone might have beaten you to it. We still kick ourselves for not being the first one to register pizza.com.
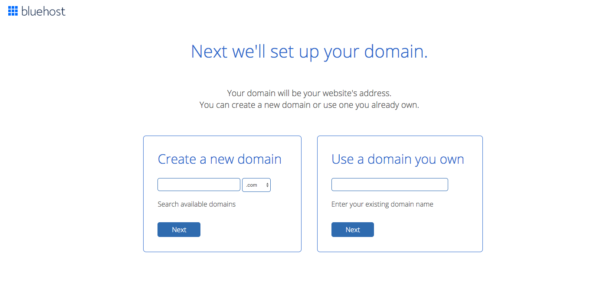
Anyway, once you get to this point, just type in the domain name that you want your next blog design tips you to have. The domain name for this blog is justcreative.com. Like we said before, your first choice of a domain name might be taken and that’s ok, there are a lot of other websites out there and there is bound to be a fluffykittens.com already.
That’s perfectly ok. If your first choice isn’t available, try others until you find one that hasn’t been snatched up, or you can select the option to pick a domain name later on after you take care of everything else regarding your account. Sometimes, putting something off for a little bit is a better idea than stressing over something.
If you hang around on this page too long or move your mouse up towards the top of the page, you’ll see this nifty little popup that will let you skip this step for the time being.

So, you’ve picked a plan and chose (or didn’t choose) a domain name. You must be all done right? Time to go home and kick your feet up?
No way my hopeful little friend. We have to finish creating your account now.
Finish creating your account
If you’ve ever signed up for anything online, you pretty much already know how to handle this part of the account creation process. Enter the standard information like your name, email address, and address. If you have a Google account, you can save some time and complete the form by connecting it to Bluehost.
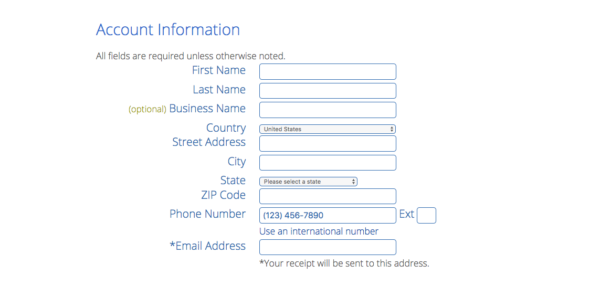
Tip: Make sure you use a current email address. Your login details are going to be sent there when you’re all done.
Decisions, decisions
After completing the account information, this is where you’ll need to choose a plan for your account based on how much you want to pay to lock in that price plus how far in advance you want to pay.

Bluehost offers options that allow you to pay for 1, 2, 3, or 5 years upfront. While choosing a 5-year plan may seem overly expensive right out of the gate, think of it this way: You’re investing in yourself and committing five years to make your blog all that it can be. There isn’t a wrong choice here, you just need to choose the one that works for you.
Unfortunately, Bluehost doesn’t offer a monthly plan and there is a good reason why. There are other hosting companies out there that do but at the same time, the overall cost for a year ends up being more than if you paid for a year upfront. So not only is it more convenient but it also saves you money.
Is there a best plan to choose?
While any plan you choose will work, you have to think about things long-term. Is this a long-term thing and you’re going to be successful no matter the obstacles that pop up or are you dipping your toes in the water to see if this is for you? No matter which camp you reside in, there is an option for you.
We recommend the “Prime 36 Month Price” because not only is it the best option if you are looking to make a real go at starting a blog but it also gives you the lowest price possible for hosting your website. It also secures that rate for your blog hosting for the next three years which is great because if you were to select a one-year plan, your rate after that first year could increase when you renew it.
If you have it in your budget and are serious about starting a blog and seeing it through to the end, pick the longest plan that you can comfortably afford.
Customize your plan (skip all but keep one)
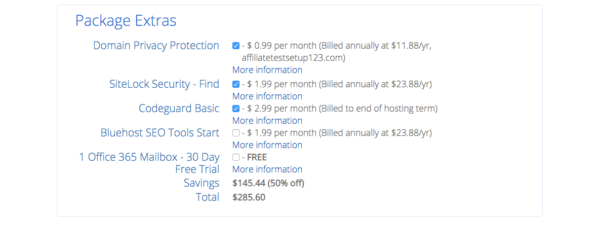
After you choose your plan, you’ll see a list of package extras that you can add to your plan. If you didn’t select it before, you still have an opportunity to select the Domain Privacy protection to keep your information private.
The other options, while they are important and can be helpful, aren’t as necessary as the Domain Privacy and in many cases, there are many free and budget-friendly plugins and tools that you can use to enable those features (We’ll touch on that in a little bit).
If you choose a Basic or Plus Plan, adding Domain Privacy will only increase your overall hosting cost by about $1/month. That’s pretty incredible considering the protection that it offers you. At the bottom, you’ll see the amount that you’re going to pay today. You need to remember though that depending on the length of your plan whether it’s 1, 2, 3, or 5 years, you won’t have 4to pay again until your plan expires.
Tip: If you pick something and decide that blogging isn’t for you, Bluehost has a 30-day money-back guarantee so there’s no real risk to trying.
Time to Pay
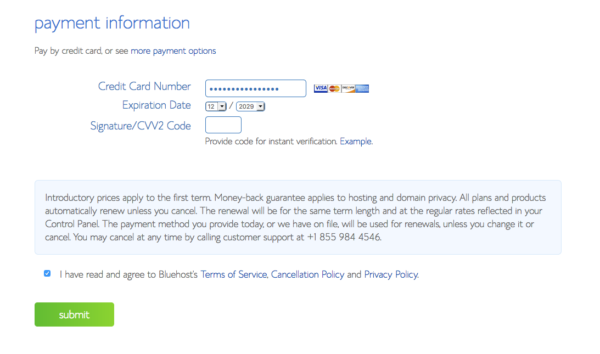
Now it’s time to get serious. You can pick your plan and enter all your personal information and exit out and nothing has changed. Once you enter in your billing information and click submit, you’ll officially become the owner of a brand new website!
Don’t get too comfortable though, we’ve still got a lot of work ahead of us to get this blog up and running.
This was just Step 2 and up until now, it’s been relatively simple.
From here, we’ll cover things like getting WordPress installed on your domain through Bluehost as well as many other goodies that can help you get started.
So, let’s all take a deep breath, arms up and down, center our chi…and move on.
Ready? Ok, on to Step 3 (cue loud, booming announcer voice)
Step 3: Make your blog look like a million bucks (for free)
Ok, so you’ve picked a niche and a title chose a domain and a hosting plan, and paid for a plan that will let you have a blog for at least the next year. How about we have a little fun then?
If you’re not very tech-savvy, this part might get a little frustrating at first but don’t worry, we’re not asking you to design your website using HTML, CSS, Javascript, and any other coding language that’s out there. If you’ve never done this before, that would be crazy to ask of you.
Content Management System 101
Ok class, let’s start with some basic terms you’ll want to learn for the rest of the semester and why WordPress is the best platform (also known as a Content Management System or CMS) to run your blog on.
Content Management System? What is that?
That, as you put it, is where you will be writing, publishing, and designing the posts for your blog. Good Content Management Systems, such as WordPress, is easy to use, let you organize your content, upload images, and videos with ease, and have control over how your blog looks when visitors come to
You keep talking about WordPress. What is that exactly?
As the most popular CMS in the world, WordPress is the platform of choice for millions of bloggers and websites including Forbes, TechCrunch, NBC, and millions more. So it’s safe to say that it’s not some fly-by-night operation. What if I want to use something else? Like Wix. I see their commercials on TV all the time. While we think that WordPress is the best option when it comes to starting a blog, like anything else, there are alternatives out there like Wix, Squarespace, and many others. The downside to many of the other choices out there is that they aren’t as flexible as WordPress can be. Having that flexibility can pay off big time when you want to create a blog that provides an incredible experience for your readers – and the best ways to make money from your content.
Now, I know some of you are thinking, “Wait a minute, I know there is a free version of WordPress out there. Why can’t I just use that?”
You’re right, WordPress does have a free version through its .org website. However, there can be some major differences between the two:
WordPress.com
- You’re unable to select a custom domain name. Any domain will appear as sitename.wordpress.com
- It is free to use but comes with major restrictions
- Making money through a site on wordpress.com is very limited
- You can’t use plugins
- The themes you can use are very limited
- Limited SEO and analytics
- To remove the WordPress.com branding, you not only have to pay to have it removed but also pay for your domain name
WordPress.org
- Provides you with total control over how you monetize your site
- You have access to incredible SEO tools (making your site easier to find)
- Has a small monthly fee (this would be the fee you pay a hosting company like Bluehost to get your blog online)
- Customizable design, no branding, and nearly unlimited plugin options.
- Start an eCommerce or membership site with ease
Sure, the one you pick is totally up to you and while it doesn’t take a rocket scientist to know how we feel, how we feel doesn’t matter at the end of the day. If your goal is to have a blog that you can grow and make money from, then there is only one choice – WordPress.org is the CMS that makes setting up and running a blog as easy as it can get.
Let’s install WordPress then shall we?
Installing WordPress has become such a simple process that it can be done without worrying if you’re doing it right or if you click the wrong button. Bluehost makes it so easy to set up, it’s foolproof. You see, previously, once you created an account, you would need to click a link to install WordPress but now, it’s as simple as finishing your account registration.
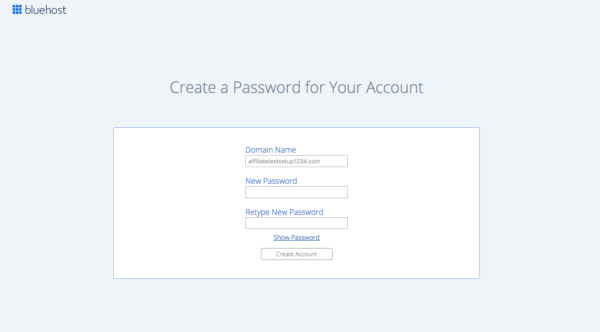
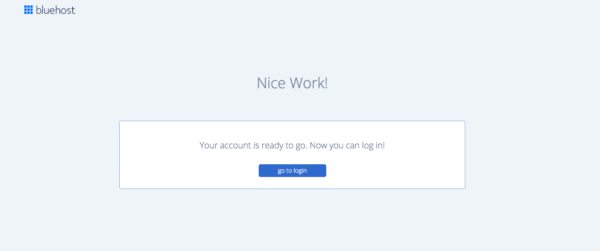
As you see above, once you see this screen, you have completed the registration and now see the option to create your account’s password
Make sure it’s a good one and no, your Little League baseball team from when you were eight years old doesn’t count. Use your noggin and come up with something easy to remember but hard to guess.
Once you choose your password and click next, you’re done.
Yes.
Done installing WordPress. No more clicking a link and waiting for your internet to motor through the download at a turtle’s pace. Bluehost installs WordPress in the background so you can focus on more important things like your first post and the design of your blog.
Pick your blog’s theme (no, this isn’t English class)
Once you move forward, you’ll see a selection of different themes that you can pick to start with. Now some of you may have already gone and bought a theme that you want to use and that’s great too but if you’re just getting started, paying money for a premium theme might be outside your budget.
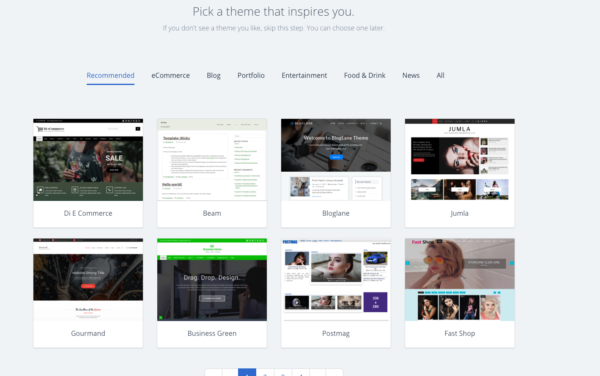
Just click on the one that appeals to you most, there is no right or wrong answer here and even if you don’t like the theme you’ve chosen, you can always change it later. If you are looking for lightweight themes, Astra is a great pick for you providing a lot of options and features.
How do you change it? Don’t lie, I heard you back there. Like many of us, if you’re not happy with something, you want to make changes and of course, you should. Once you log in, in the menu on the left-hand side, follow this path to pick a new theme:
Appearance > Themes > Add New Theme > Popular.
Why your blog’s design is so important when starting out
Many first-time bloggers may not care about the theme they use to post their content but they should. Readers can change their behavior and decide if they want to stay or go based on the features of your blog’s layout.
In a 2012 study, researchers from Google and the University of Basel concluded that users will judge the aesthetic beauty of a website and its perceived functionality in 1/20th to 1/50th of a second.
That’s insane!
It doesn’t stop there though. Thanks to the Halo Effect, a psychological bias that people can have, that feeling about the first page of your website can extend their judgment to every corner of your blog!
I know, it’s horrible.
Like honesty, a blog with good, consistent design also builds trust among your readers. It lets them know that you care enough about your blog and the visitors to your blog to make it look nice. Now, it can be very easy to go overboard with animations all over the place or using a lot of different fonts in all different colors.
The best site designs are simple, clear, and easy to navigate and read.
Plugins, plugins, plugins, get your essential plugins installed today
Once you’ve picked a theme (good choice btw), it’s time to pick which plugins that you want to use to unlock more customizations and must-do prep work so your blog has an even better chance of becoming a full-on business.
We love plugins and use them all the time. We wanted to share what we thought were the essential plugins that you need for your new blog
1.Yoast SEO – Out of all of the plugins out there, Yoast SEO is by far the most popular tool out there for WordPress, and anyone who’s used it can tell you why. Not only can it help you improve your SEO, but it can also analyze the readability of the content on your blog. Using the plugin helps make your content more accessible and better accessibility to your content means that there is a greater chance of keeping their attention.
2. WPForms – If you want your readers to be able to get in touch with you, which can be very beneficial because it can lead to other bloggers reaching out to you who may want to collaborate with you and have an easy way to contact you. WPForms is an easy-to-use plugin that lets you put contact forms on any page with its drag and drop method.
3. WP Rocket – The faster your website is, the better it will rank on Google and in turn, give your readers a better overall experience. WP Rocket is a plugin that caches your web pages and reduces their file size plus a whole lot more so your blog loads faster for every reader.
We understand that there are a whole host of other plugins out there for just about anything you could want to customize on your own blog design. While it certainly recommends trying them and seeing if they can help your site, the three we have listed will be able to have almost instant results on your new blog.
Build the “walls” of your website (about page, contact, hire)
While having a blog is a great way to get readers and make connections, your blog needs some basic information, or walls, to round out your site and give your reader more to check out other than your post about a new recipe (which was delicious, btw).
If you check out many of the sites that are on the internet, they will typically have some if not all of the following pages: About, Contact, Hire.
The About page
While for many is just a waste of a page and will be used for some basic information about who you are and what you do. Don’t ignore it though, the About page can become one of the most popular pages on your site, if you do it right and your page answers these questions:
What value are you bringing to your readers?
While it’s a page about you, many bloggers make the mistake of thinking that it has to be ONLY about you. You want to tell your readers who you are but you also want to be sure that you describe what’s in it for them and who your audience is with the overall brand concept and identify blog you’ve created.
Who is your ideal reader?
You know this person. They’ve read every post you’ve made, dissected it, and left a comment every time. While we all hope all of our readers are like this, the truth is, they aren’t but making sure that the right person reads your blog will be easier when they know that they’re in the right place.
You can do this in a lot of ways including telling your reader who the blog is for or even showing that you’ve been a part of this community for some time now with testimonials or examples of other publications you’ve written for in the past. A lot of blogs will post images of the other sites that they’ve been published on to lend to their credibility.
Why should they listen to you?
This can be the million-dollar question and it doesn’t matter if you’re running for President or writing a blog post.
If you’ve done a good job setting up your blog’s theme and design, your reader should be able to start getting a sense of who you are and you can talk a bit more about yourself if you’d like and you can answer some questions they might have or share a story that led you on this path.
People love to connect with others that have unique stories and can show some vulnerability and it can lead to you having a treasure trove of loyal readers.
The Contact/Hire me page

The contact me page on any blog is one that is even easier to overlook than the About page but if you’re looking for a way to connect with your readers or possible collaborators, it’s essential.
A contact page is a great way to turn it into an easy “Hire Me” page. You can do this by telling the reader what it is you do and that if they’re interested, you’d love to help. You’re not selling anything, you’re offering a service at this point that they can take advantage of if they want to.
Having testimonials from previous clients, if you’re offering a service as well as having a blog can give you credibility and a satisfied customer that people can believe.
Step 4: Write your first blog post
Look at that! You’re on the backside of the mountain and one step closer to not only having a blog but making some money from it,
Now, we get to the part that I like the best: writing.
No one ever reads a blog online because the site looks nice or that they put out a new article every day, even if it does help. People read blogs because of what other people have to say about something they care about. The best way to bring in readers and make money in the future by marketing blogs is by creating strong content.
While at the beginning of our guide, we said that you need to make sure that you have a niche that you can focus on and craft your blog around. Knowing this before you start writing that first blog post can help you answer what’s your why for blogging about this topic?
- Why do you care about the topic?
- Why is this a topic that you feel you can value?
- Why should other people listen to you?
If you have a niche already, you should be able to answer some of these whys already and if you can’t, that’s fine, you will be able to in time. Having a niche is important because it will help you decide on the design of the site, your content calendar, how you can market your blog, and how readers and other bloggers will find you and make connections.
Researching to come up with smart ideas (who knew?)
If you have a niche already, you might have a few ideas that you can use for a couple of initial blog posts but as you keep moving forward, you’re going to want to do some keyword research so you can find the right blog posts ideas that will keep readers coming back.
After you do your research, what do you write about? Honestly, you can write about whatever you want to, it’s your blog and you can post what you want and one of the great things about a blog is the freedom it gives you to voice your opinion and share it with others. Over time though, it can get tougher to come up with blog post ideas.
A great way to know what you’re writing about next is a simple list of articles that you have coming up so as you go forward, you’ll write the next one on the list and add to the list as you develop new ideas to feature for your readers. This helps you get over that hurdle of writer’s block that we all get and have a stable of ideas that you can pull from.
However, no matter how long the list is, prioritizing which posts should come first can affect how much traffic might come to your blog and help your post rank well on Google for your topic so you ALWAYS want to do your research first.
Finally, you are ready to write your first blog post.
Ah, do you smell that new blog post smell?
No? Maybe it’s just us then.
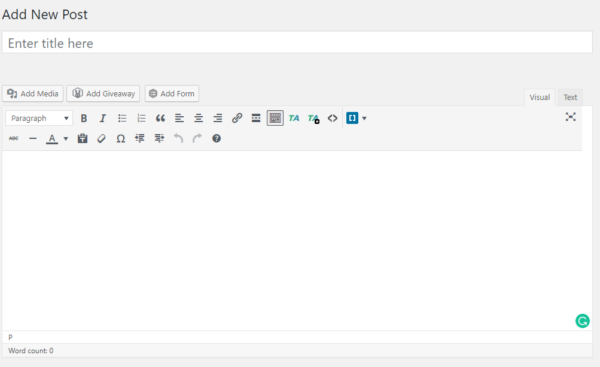
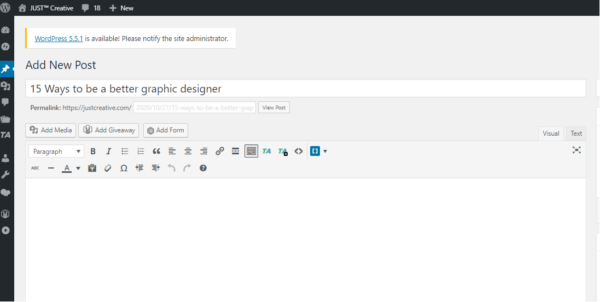
Anyway, now we can start putting our thoughts on the screen, putting ourselves out there for everyone and anyone to read and it starts as simply as clicking “Add New Post” on your WordPress Dashboard.

(Not as exciting as you thought huh?)
Once you click on ‘Add New’, you’ll be presented with the greatest thing a blogger could ever see (and no, we don’t mean money, though that’s good too), a blank canvas.
But once you’re here, what do you do next? Well, it all starts with a headline that when a visitor to your site sees it, they can’t help but click on the link and start reading.
That sounds great but how do we do that?
Well, let’s find out.
Crafting a blog post headline that gets clicks
One of the main reasons you started a blog in the first place was to have people read your blog, right?
Getting those people “through the door” takes some effort and it all begins with a well-crafted headline for your blog posts that are engaging, interesting, and most importantly, provide information to the reader who is looking to accomplish something by reading your blog post.
To get started, at the top click into the “Add Title” bar and enter in a title like…
A great way to learn how to craft great blog post headlines is to look at some of the other blogs in your niche and paying attention to the types of headlines that they use:
- Do they capitalize every word in their headlines?
- Do they lead with numbers on many of their posts?
- How many of their article headlines include parentheses?
By looking at your competition, and yes, they are your competition, you can ascertain what works for them and use it to build your audience and make more money in the long run.
Like many other tools on the internet, there is a great tool available for free that you can use to check the strength of the headline that you’re using. Created by the Advanced Marketing Institute, their headline analyzer will grade your headline on a scale from 0 to 100 (with 100 being a perfect headline) based on the millions of headlines that they have analyzed.

Like anything, getting better at writing headlines takes time and practice. The more blog posts that you write, the better you will become at it.
Another way to garner headline ideas is to do a quick Google search for the keyword phrase that your blog post is about and you can get inspired by what other bloggers have done. You don’t want to directly copy other bloggers, just get a push in the right direction.
Making your blog post URL SEO-friendly
Now that you have your headline to attract readers, you need to make sure that the URL for your blog post ranks well in Google so people searching for your topic can find it. Far too many people just use the URL that WordPress creates automatically and honestly, that’s lazy writing especially if you’re looking to make money from your blog.
With our example from above, our blog post title “15 Ways to Be a Better Graphic Designer”, we want our post to rank high so more people find us online and trying to rank for keyword phrases such as “Be A Better Graphic Designer” is exactly what we should enter as our URL:…
/be-a-better-graphic-designer
When it comes to creating a URL for your blog post, there are some tips you should remember:
- Separate each word in the URL with a dash to make it easier to read
- It shouldn’t be more than 3-5 words long (less is better if you can do that)
- Don’t use numbers unless it’s essential
- ALWAYS include your target keyword phrase
Grab your reader’s attention and never let go (otherwise known as the introduction for your blog post)
In the book, On Writing Well, William Zinsser offers the following advice:
“The most important sentence in any article is the first one. If it doesn’t induce the reader to proceed to the second sentence, your article is dead. And if the second sentence doesn’t induce him to continue to the third sentence, it’s equally dead. Of such a progression of sentences, each tugging the reader forward until … safely hooked, a writer constructs that fateful unit: the lead.”
While I don’t think its necessarily as dire as that, Zinsser does have a point:
You only have a few sentences to hook your reader and convince them that what you have to say is worth their time. Writing an introduction doesn’t take long to do and even less time to master. As you grow your blog and write more posts, you will learn how to keep readers engaged and hanging around your site longer and longer.
The easiest way to write an introduction that is compelling enough to keep the reader going is to use the five W’s we all learned in grade-school English class: Who, What, Where, When, and Why.
There is never one way to do anything though. Many will tout writing the conclusion of your blog post first. Many of the posts that I have written have started with the body of the post and writing the introduction and conclusion later. Everyone has their method and you will find yours.
How to make the design and layout of your post look good (Hint: it’s called optimizing)
So you finally hit that last period on your keyboard, leaned back, and feel great. Your first blog post is done.
Congrats!
Now, we need to make it look good for those people who are going to be reading it.
You’re not done just yet darlin!
What looks good to you and what looks good to your reader is subjective. Crafting a blog post that people will like to look at and most importantly – read, will take more than just the words on the screen, unfortunately.
Optimizing your blog post to look its best will help make it resonate and the things you do to structure your blog post can go a long way to making that happen:
Make sure it’s readable
Do you remember in English class you would get your paper back and the teacher would put a note stating that you should have started a new paragraph?
Yes? Well, the same rule applies here as well. Reading one long block of text can be boring and tiresome to a reader and many will just leave rather than try to digest it.
Break up your writing into smaller 1 or 2 sentence blocks to keep it flowing. Also, having tons of images, different fonts, and crazy colors just distract your reader. The font size should be large enough to read easily. Generally, using a font size of 16pt or higher is fine but don’t go below that.
Add an image at the top
At the top of many blog posts that you may have read in the past, you’ll see an image leading you into the article. This is known as the featured image. Our brains, as amazing as they are, remember things one of two ways: visually and verbally.
Putting a featured image at the top of your post combines the two and gives you a better shot of having your article remembered later on by your reader, recommending your blog to others, and maybe even collaborating with you down the road.
Subheaders are your friend
As we mentioned before, reading one big block of text can get boring quickly. A great idea, especially when you are changing the subject is to use a subheader. Many people will suggest using one every few hundred words or so but honestly, we think that it depends on the niche you’re writing about and the points that you are trying to make.
For example, look at this post. Whenever we are changing direction and starting to cover something new, a subheader will appear. It’s easy to think of subheaders as chapter titles if this were a book you were holding.
Add some style!
A blog with a good design guides a reader through their article, making it feel like they are having a conversation or reading a story and a great way to do that is by using bold or italics on key parts and thoughts you want to point out.
By highlighting key text in bold, you make it stand out so it is easier to remember and gives the reader a feeling of “Oh, this is important. I need to remember this.”
While it’s a great skill to use, it can be overdone very easily. Saying that everything in your article is important is akin to saying nothing in your article is important.
Using these tips, you can create immensely appealing blog posts that are not only easy on the eyes but also easy for your reader to digest.
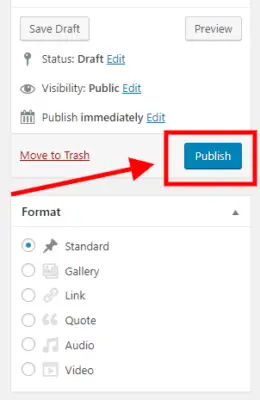
Click Publish on your first blog post (Finally!)
We’ve finally reached the point where you can hit publish on your very first blog post!
#happydance
Your first post should ideally be around 1,000 words although shorter or longer works as well. Don’t forget, you’re new at this, it may take some time, be patient.
In the meantime, for every post you publish, be sure to check out the suggestions made by the Yoast SEO plugin (you did install it, right?).
This will ensure that your post is SEO-friendly and being SEO-friendly will give your post the best chance of ranking well in search results from Google. Once you do that, choose the category that your new post is going under and click that magical ‘Publish’ button.
Wait a minute…before you do, did you add any images to your post or did you just plop a big old block of text like a brick wall for people to read?
If you’re thinking, “I don’t need images, I want people to read my words, not look at pretty pictures.”, then you’re kidding yourself.
Studies have shown that a blog post with images can receive up to 94% more views than those without. Do you think your post is good enough to forgo those statistics?
Just in case, here are some great online photo resources (plus, they’re free!)
Unsplash
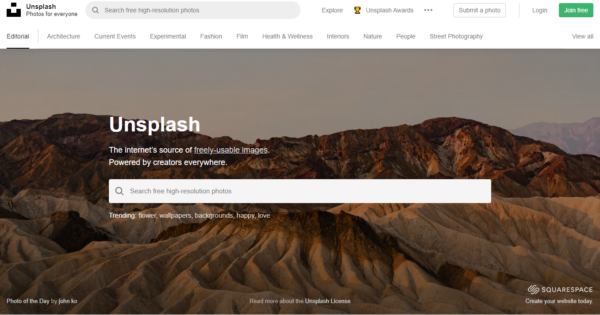
If you’re looking for free-to-use photos for your blog posts, you can’t pick a better resource than Unsplash. Curated by their team to ensure that it’s high-quality which means that you’ll only find the best photos on their site.
The best part? Because of the Unsplash license, you don’t have to add attribution for the photographer (though it is recommended) which makes the site the easiest option out there
Pixabay
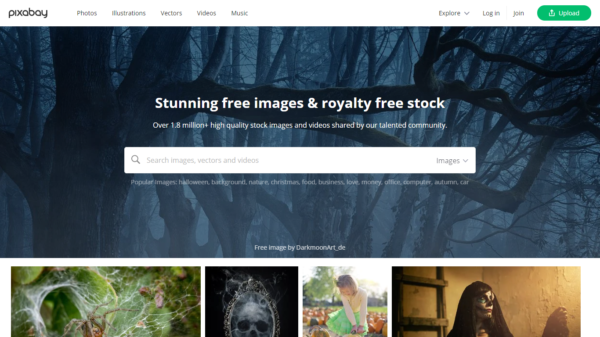
For some, quantity is more attractive than quality and if that’s you, you should check out Pixabay. With more than 1 million photos, videos, illustrations, and vector graphics, you can use them all for free. While the quality isn’t curated like at Unsplash, if you’re looking for just the right photo, Pixabay will probably have what you’re looking for.
Now that you’ve added photos…now you can hit publish!
You just published your first blog post. Feel the weight come off your shoulders and you can relax…for a minute.
While it’s incredible that you published your first blog post, how are you going to get readers to find it?
Read on, fair traveler, and learn how you can promote your content, drive traffic to your site, and ultimately make some cold hard cash from your blog.
Step 5: Announce your new blog post from the hilltop (not really, there’s an easier way)
Let us stop for a quick second and offer congratulations on posting your first blog post. How many readers do you think will check it out?
You are promoting your blog so people can find you right?
No? Ugh..ok, let’s get started.
When it comes to promoting your blog and your posts to the millions of users on the internet, it doesn’t take millions of dollars or expensive advertising companies putting out information to drum up interest.
With some simple tools, you can not only share your posts with the world but also get them in front of new readers who have an interest in your niche.
Let social media be the Don King for your blog

These days, if you want to promote something, you don’t turn to radio, tv, billboards, or direct mail, you go where the people are and people are on social media.
There is a great quote from Gary Vaynerchuk that sums up how he views social media platforms:
“Facebook, Twitter, YouTube, and Instagram are ABC, NBC, and CBS, and what I’ve figured out for the last decade is how to make M.A.S.H, and The Andy Griffith Show, and ER, and Seinfeld.”
People are not watching TV. They are on their phones, tablets, and other devices checking out what people have posted. Choosing the platform that best fits your niche and the interests of your audience, is the one you should go with.
For example, if you’re blog is about cooking, you may want to promote on Pinterest, YouTube, Twitter, TikTok, and other platforms that work with what you’re trying to do.
There’s no point in promoting on every platform that’s out there.
Experimenting with different platforms can help you find what works best.
Be a guest blogger on relevant blogs and post content to Medium, LinkedIn, & Quora
While it’s great that you’re taking the journey, starting your blog, and hopefully, with hard work, will make money from it, one of the best things about blogging doesn’t have to do with any of that.
When you start a new blog, you become part of an online community of other bloggers that despite what other people may lead you to believe, strive to help each other out.
If you’re looking to connect with your audience, guest blogging on relevant sites in your niches is, without a doubt, the #1 way to connect to your audience that has already been established.
Not only do you help your fellow blogger by giving their hands a break for a bit, but you also put your sign out there, letting people know that you have a blog in this space.
If some of their readers like your content, that could lead them to your site and turn them into your readers. Plus, you can reciprocate back to other new bloggers who are looking to get started.
Forums and message boards

If you’ve ever been on Facebook, then you know what a Facebook Group is. Essentially it’s a group of people who share a common interest in a topic and if your niche is related to that topic, it can be a great way to drive traffic to your site.
Now, Facebook isn’t the only option. You may have a blog in a niche that doesn’t have a presence in their Groups and that’s ok. You can try searching for a niche that is generally related to your niche or even online sites such as Reddit or LinkedIn.
Build an audience with an email newsletter
While having people come to your site to read your blog posts is great, having them come back, again and again, is even better and one of the best ways that you can do that is with an email newsletter.
It is a great and easy way to keep people excited about your blog and what you’re working on and should be one of the first things that you set up after starting your blog.
There are many different tools out there that you can use to create an email newsletter for your site. For new bloggers, Mailchimp is the best choice for free email marketing.
Other ways to promote your blog
While we did feature some of the most popular and relatively successful options, that doesn’t mean that they are the only options you have. Some of these include:
- Networking with other bloggers
- Interviewing people in your niche
- Learn from other bloggers
- Respond to comments on your blog
The only thing standing in your way from making your blog a success is you. People like to use excuses all the time why they never did something or never tried. If you want to be a successful blogger, you need to eat those excuses for breakfast.
A little hard work never hurt anyone.
Step 6: Make money with your blog!

Here we are – the last step.
Well, young grasshopper, when we first met you didn’t even know what CMS was, and now, look at you – you have a name and niche, a hosting plan, domain name, website, and have published your first blog post.
Now, it’s time to take all of that knowledge, step into the advanced class, and learn how you can make money from your blog.
Before we pull back the curtain, there’s a reason why this is the last step and not the first – making money, while important, should be the last thing you focus on when you start.
Finding readers, building relationships with them, building a community around your blog where you can continue to deliver value through your content should be your focus from the start, not selling someone into taking your online course, or hiring your freelance services.
If making money if your primary focus, you’ve already failed.
That doesn’t mean you should think about how you can start making money with your blog. Like anything, some of the options that we can share with you will be easier than others, especially when you first start out but as your blog grows, you can start to think about adding them as well.
Option 1: Freelancing (Selling your services)
For many people, the first way they start earning money from their blog is by offering their services to other people. This is usually the easiest and quickest way to start earning money from your blog and many successful bloggers still do this today.
Landing your first client takes having a good pitch and having a blog will help this tremendously. Adding content to your About, Contact & Hire Me pages to showcase some examples of the work you’ve done that you’ll pitch potential clients on.
If you don’t have any samples (or clips as they can be called) yet, don’t worry. Spend a day or so and write a few sample articles and host them on your blog as if you got paid to write them for a client.
The best part about freelancing is that just about any skill or service can be monetized. Whether you’re a writer, photographer, designer, or even just a virtual assistant, it is very likely that if you pitch well enough, someone will hire your services.
Option 2: Affiliate programs
If you’ve ever been on a blog and saw something like this:
Disclosure: Please note that some of the links below are affiliate links and at no additional cost to you, I’ll earn a commission. When you purchase hosting using my Bluehost affiliate link, they compensate me, which helps make this guide free of charge to you. Know that I only recommend products and services I’ve personally used and stand behind.
That disclosure means that the owner of the blog you’re reading is part of an affiliate program with the company mentioned and if you click the link and purchase an item, they will receive a commission.
How does this pertain to you? Well, one of the biggest moneymakers for a lot of blogs is through affiliate programs. Once you’ve created a small but loyal readership that is engaged and interested in what you have to say, you can then reach out and broker an affiliate deal with individual business owners, brands, and startups that are looking to have their products featured on your blog.
Option 3: Sponsored Blog Content
This option may not be as easy to execute as the first two. Unless your audience is a good enough size on your blog or social media, being able to post sponsored blog content might take you some time to accomplish.
When you do have an opportunity to publish sponsored blog posts, make sure that it doesn’t feel forced. Your consistent readers will know when something is amiss and you run the risk of alienating them if you do it wrong. Weave it into your normal style naturally and it will be seamless.
Option 4: Online Courses
There are so many people out there who have an experience or a skill that others would pay to learn from them and that’s where online courses come into play.
Through the internet, you could learn how to play the harmonica like a professional and chances are, there is an online course that could teach you that (and guess what? There is!)
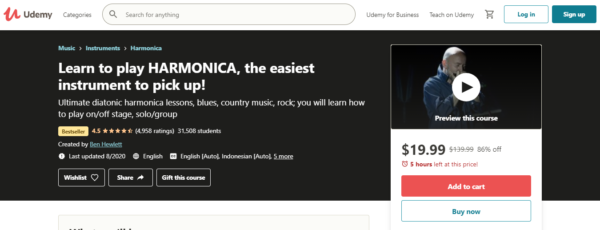
People will pay to be taught the right way to do something so they don’t have to go through the process of trying to learn on their own and failing. The best part about using an online course to make money from your blog is that you don’t need a huge audience to earn money from an online course.
If anything, having an audience on your blog can help because you can cross-promote your course on your blog to help excite your readers, especially if it’s in your niche.
While there are many other ways to make money from your blog, the options we shared with you are typically the most common ways bloggers will monetize their blogs to earn money.
How to Start a Design Blog & Get Paid
Starting a blog can be one of the most stressful, exciting, rewarding, successful experiences you can have. Growing a successful blog ultimately comes down to being willing to put in the hard work and also be excited to share your thoughts and engage with your community.
Focus on writing incredible content, connecting with others in your niche, and sharing what you’re working on with them.
The traffic, money, and everything else will come in time.
Hopefully, you’ve made it through this long post of ours and are excited to start your blog. We look forward to reading it!