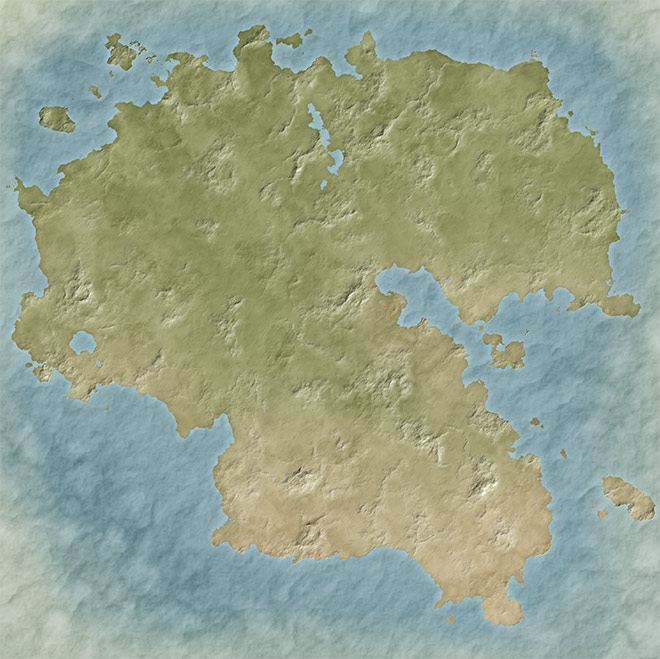
Follow along with today’s Photoshop tutorial to create your own fantasy world, just like the fictional story settings of Neverland, Middle-Earth or Westeros. We’ll use Photoshop’s built-in tools to establish the landmass and sea, then construct hills, mountains and deserts with some simple filter combinations, before finishing off the artwork with a vintage paper texture and place names to simulate an old world map.
Watch the video
Subscribe to the Spoon Graphics YouTube Channel

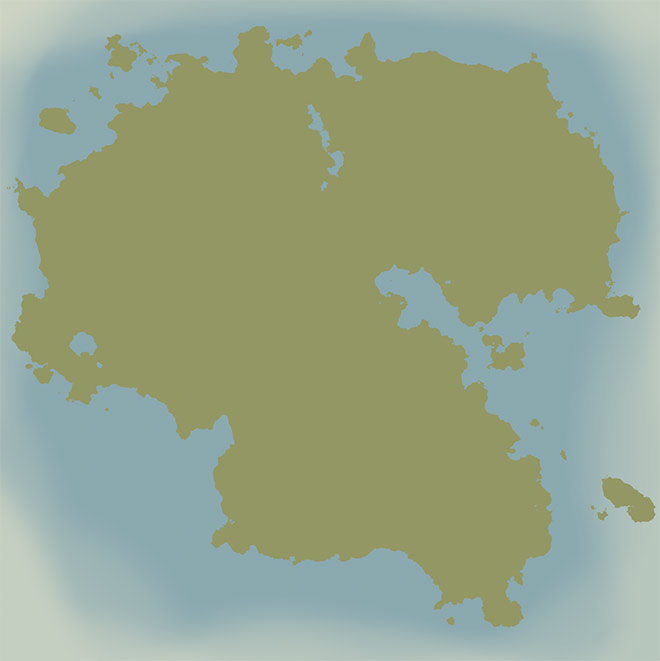
This kind of fantasy world map is ideal for storybook art, tabletop gaming or children’s party invitations. The shape and geography of your landscape is mostly determined by random, so it is interesting to see how your fictional map turns out as you progress through the process. By following the same steps, you can create a unique world every time!
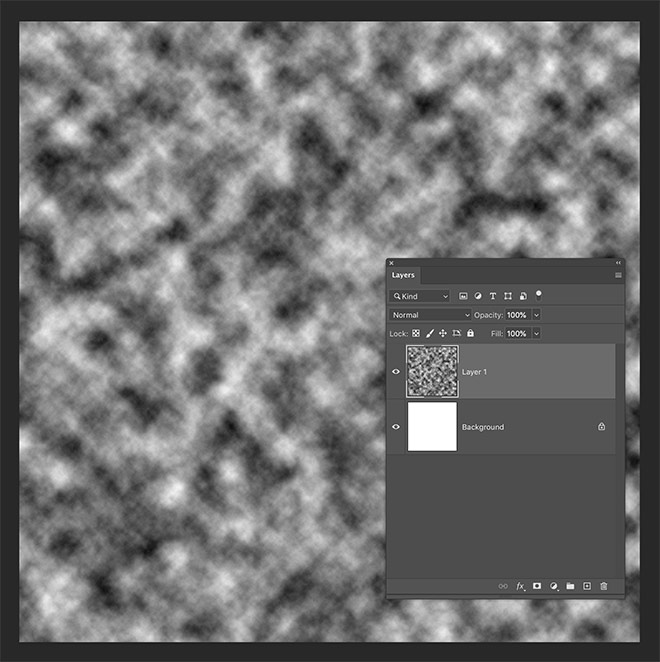
Begin by creating a new document in Adobe Photoshop. I’m using a canvas of 3000x3000px, but your map could be created at any size. Add a new layer and fill it with the Filter > Render > Clouds menu.
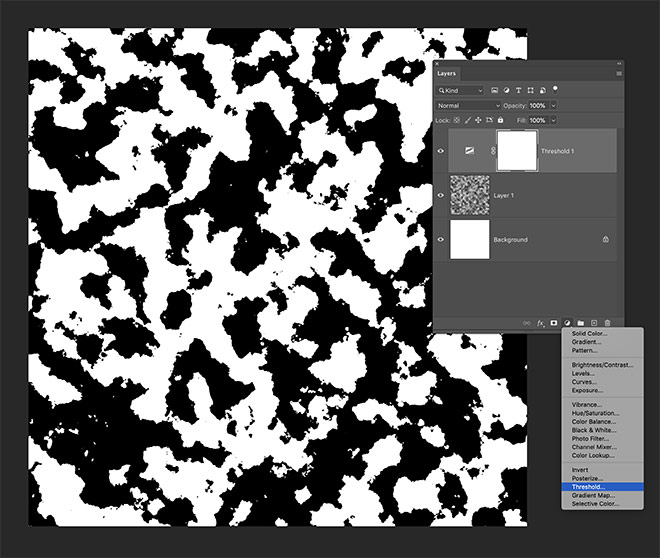
Add a Threshold adjustment layer, which will transform the clouds into clearly defined shapes.
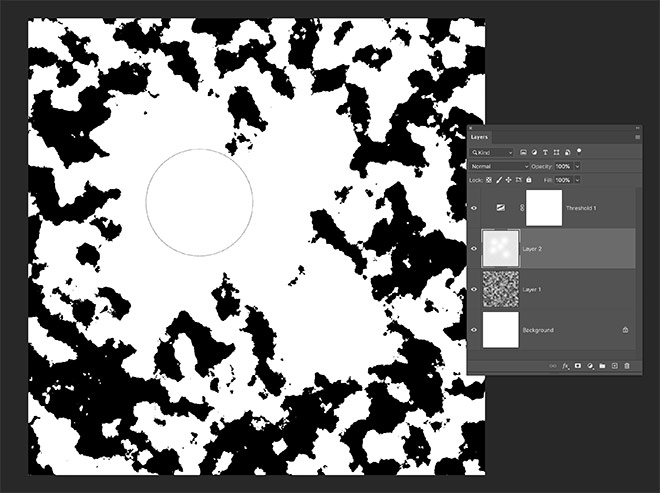
Select the clouds layer again, then add a new layer above it. Use the brush tool with a soft tip to paint areas of white to join groups of shapes together to form a larger landmass.
Use the X key to swap the foreground and background colours around to paint with black around the edges, to effectively form the sea. Leaving small isolated areas of white produces small islands, while areas of black within the main landmass represent lakes.
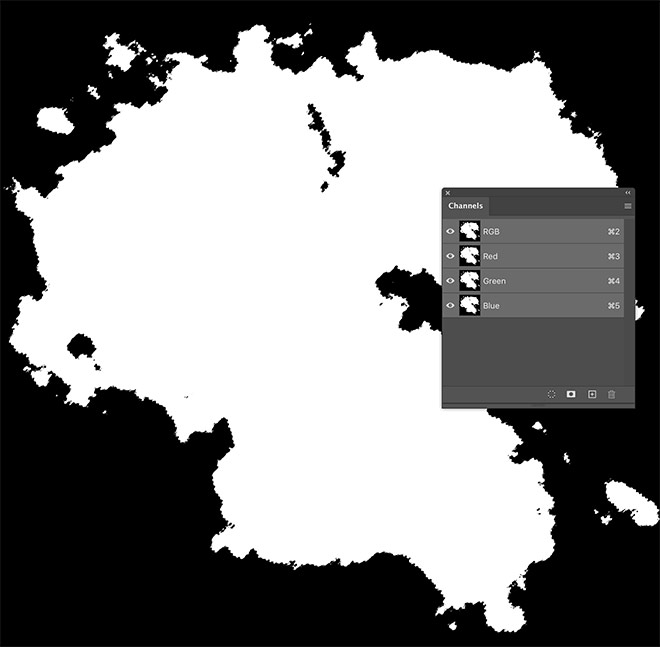
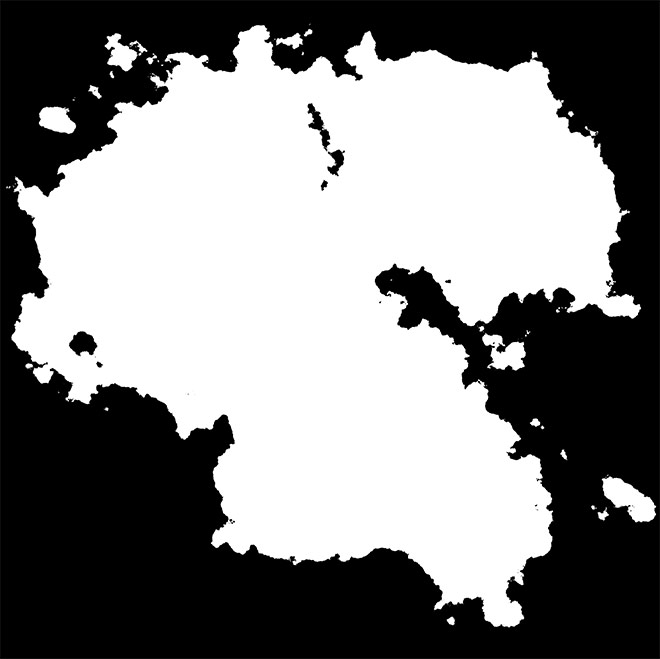
Open the Channels panel and hold the CMD key (or CTRL key on Windows) and click the thumbnail of the RGB layer to load its selection.
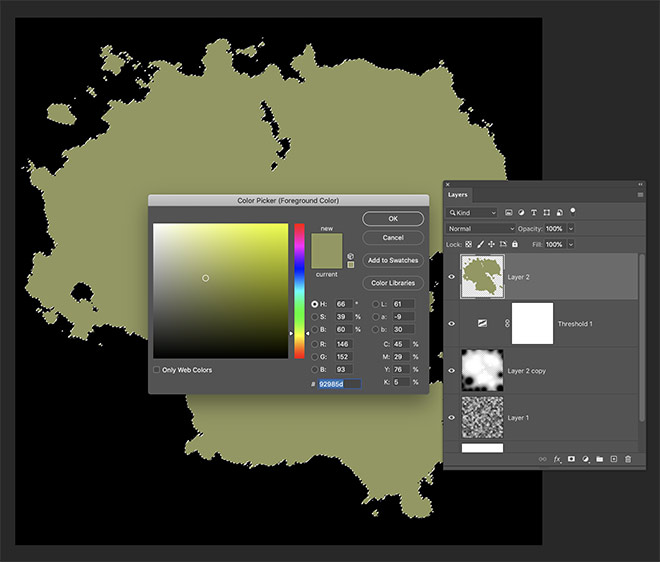
Back in the Layers panel, add a new layer and fill the selection with an earthy green colour, such as #92985D. Press CMD+D to Deselect.
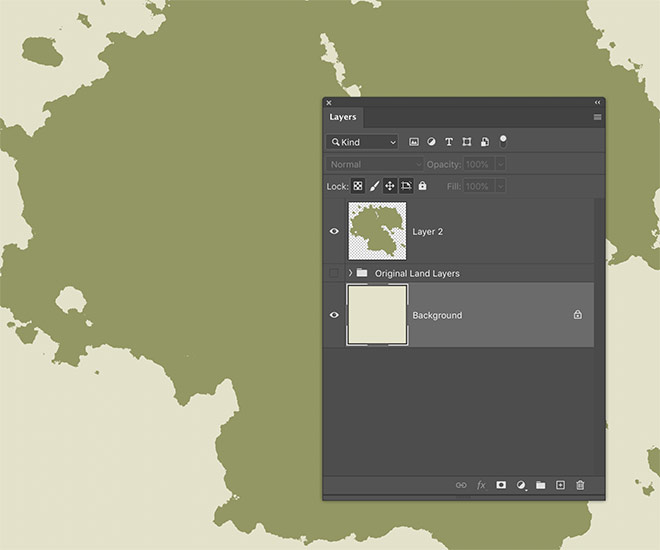
Give the Background layer a new fill too, using a value like #E3E2C8 to represent the colour of old paper. Group those original layers that formed the land and hide them as they’re no longer needed.
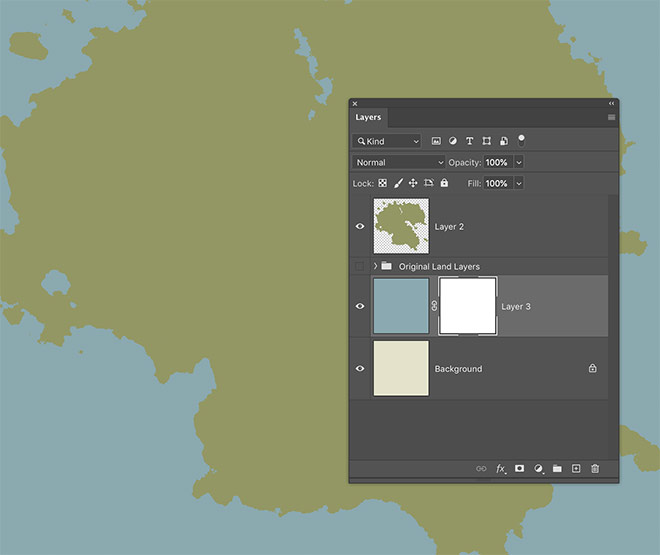
Add a new layer and fill it with a blue of #83AAB1 to represent the sea. Apply a layer mask to this layer, then select the brush tool.
Reduce the brush opacity setting to around 30%, then lightly paint with black around the edge of the document, following the outline of the land to fade out the sea.
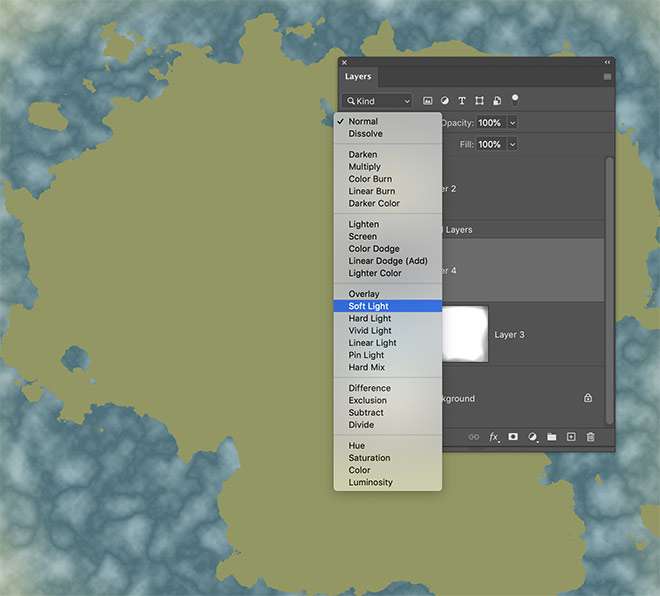
Reset the foreground and background colours to black and white. Add a new layer and go to Filter > Render > Clouds, followed by Filter > Render > Difference Clouds. Set this layer’s blending mode to Soft Light and reduce the opacity to around 50%.
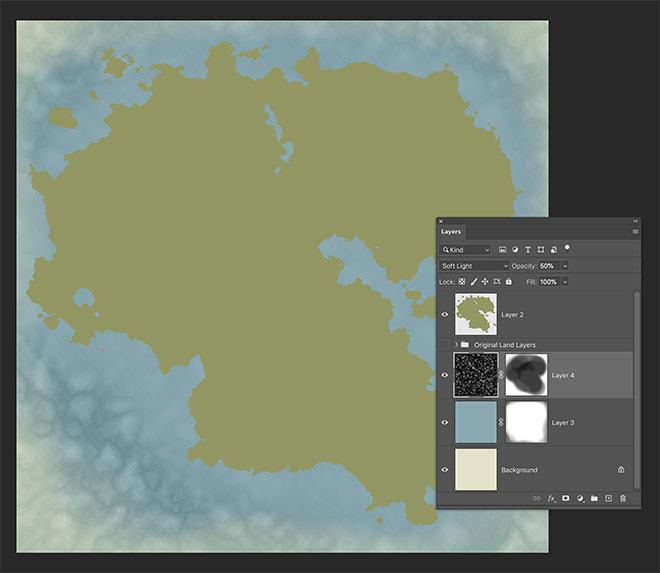
Apply a layer mask to this clouds layer, then use the brush tool to fade out the texturing to form shallower bodies of water, particularly around the coast.
Add another layer and apply the Clouds and Difference Clouds filters again. This time, go to Filter Stylize > Emboss.
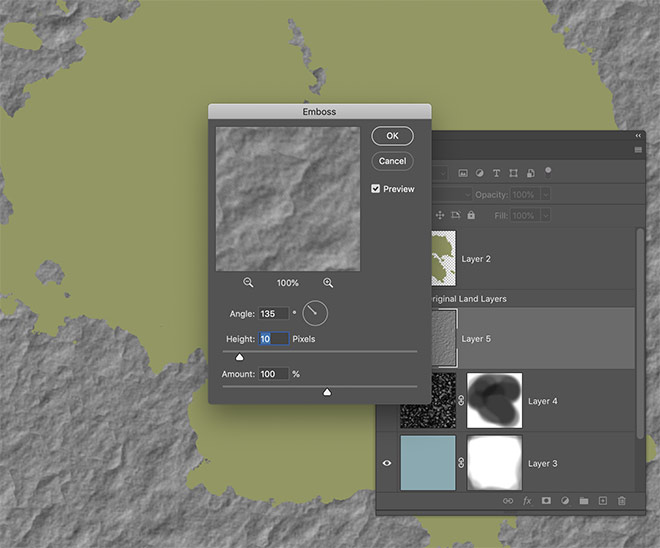
Configure the settings to around 10px height, with a value of 100%.

Set this embossed texture layer to Soft Light to add some waves to the sea.
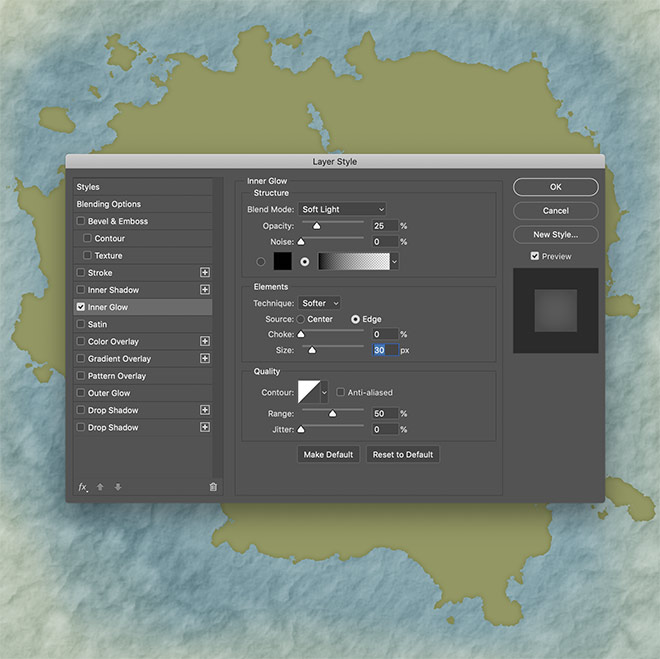
Double-click the main land layer to add some Layer Style effects. Begin with an Inner Glow. Reset to default values, then configure the blend mode to Soft Light, the Choke to 0, Size to 30px, then reduce the opacity to around 25%.
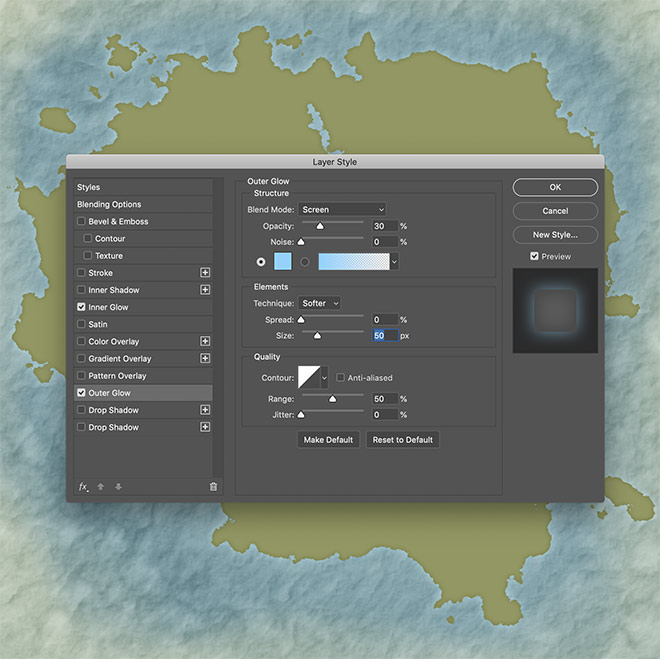
Add an Outer Glow and configure the settings to a hue of #80D4FF, Size of 50px and Opacity of 35% to make the sea look shallow around the coast.
Let’s use the same Difference Clouds effects to apply some texturing to the land. Apply the Filters on a new layer. You can use the CMD+F shortcut to regenerate different formations of clouds to further randomise the result.
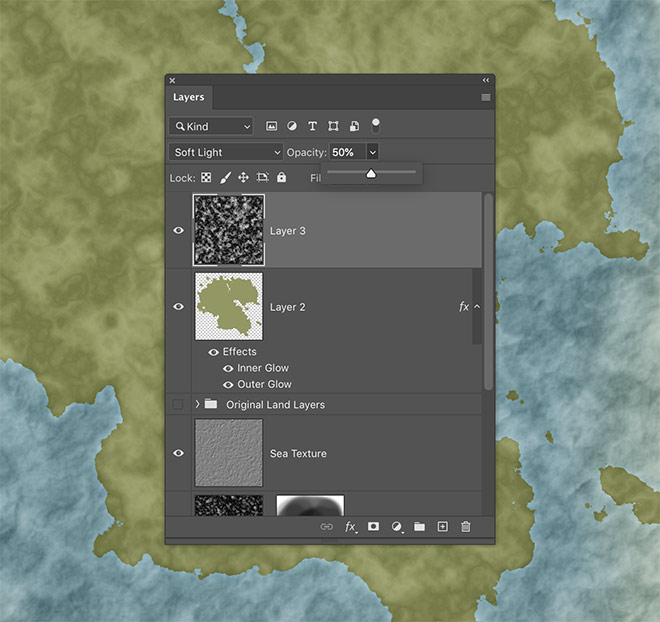
Set this layer’s blending mode to Soft Light and reduce the opacity to 50%.
Hold the CMD key and click the thumbnail of the land layer to load its selection. Apply a layer mask to use this selection to effectively erase the texture from the sea area.
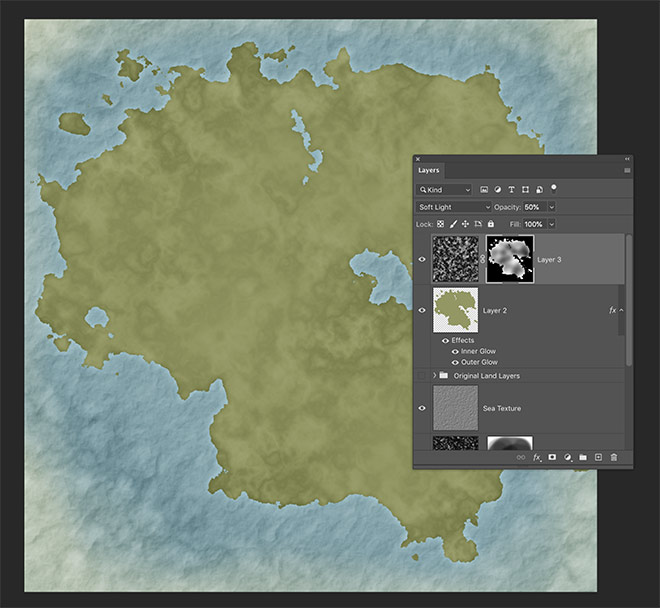
Paint within the mask with the brush tool to reduce the prominence of the texturing in certain areas to make the land look flatter.
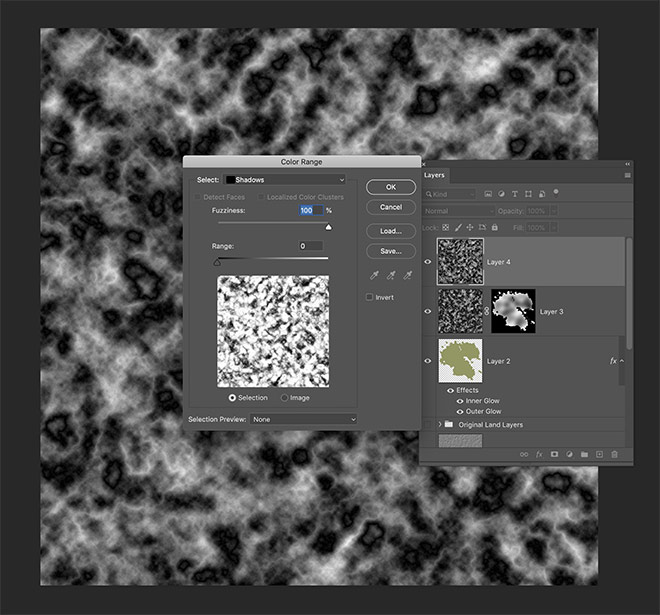
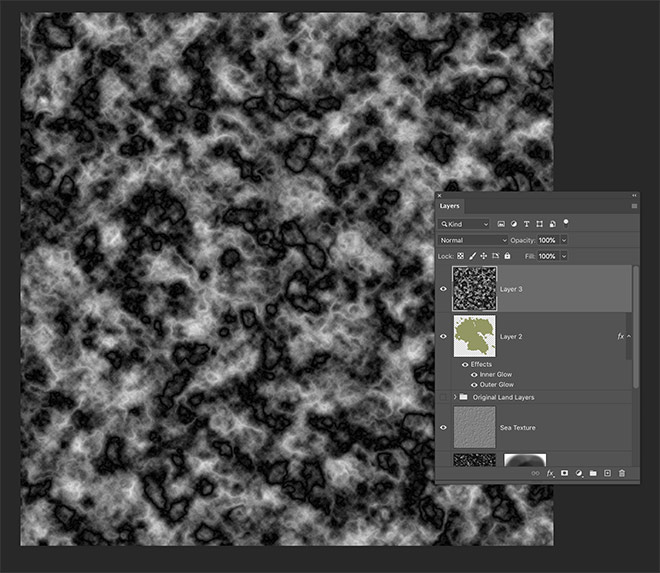
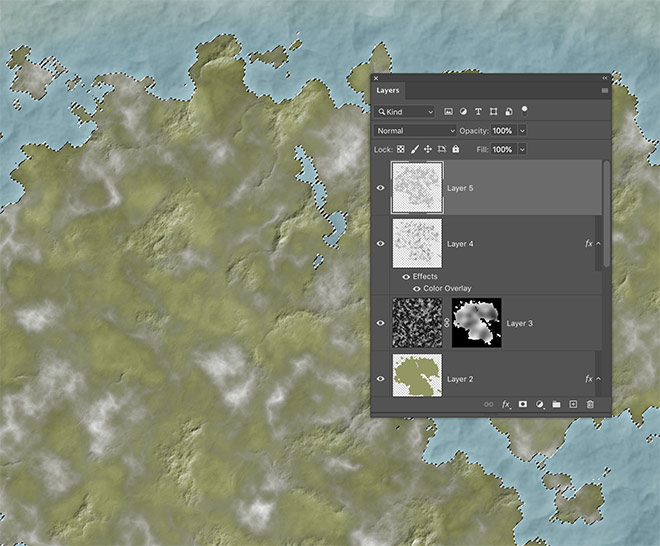
Add another new layer with the Clouds and Difference Clouds filters. This time go to Select > Color Range. Choose Shadows, then set the Fuzziness to 100% and Range to 0. Delete this area with the Backspace key.
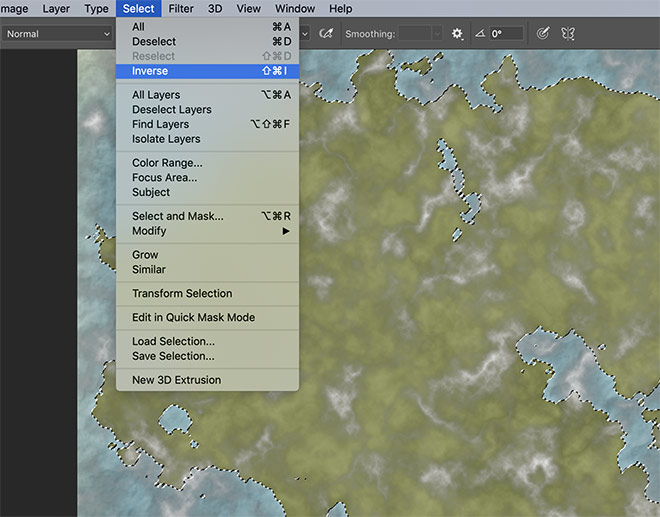
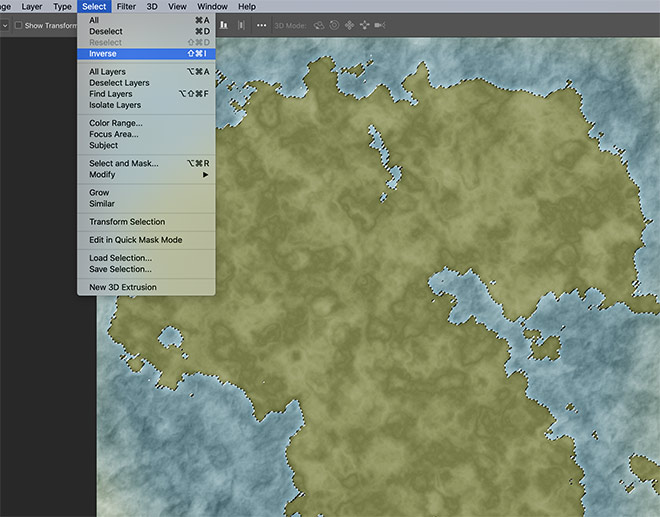
CMD+Click the land layer to load its selection again, then go to Select > Inverse. Hit the Backspace key to delete the clouds beyond the land area.
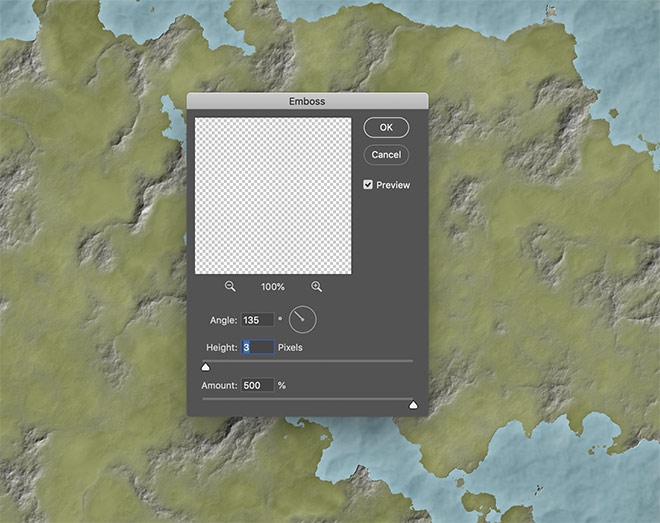
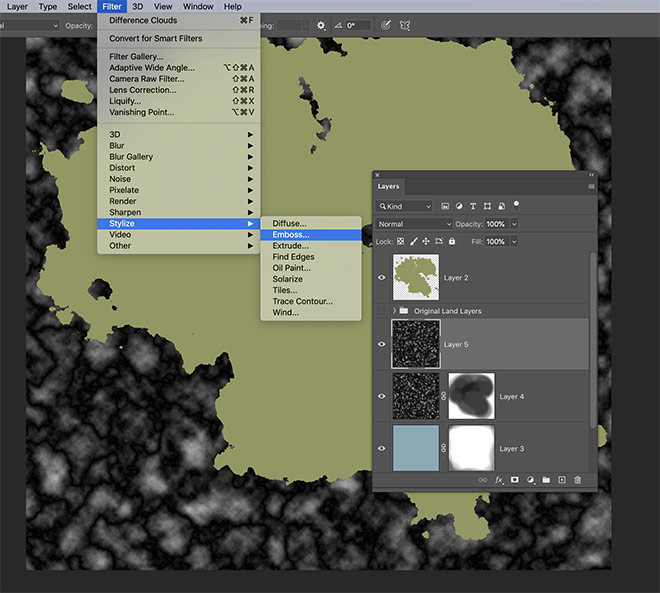
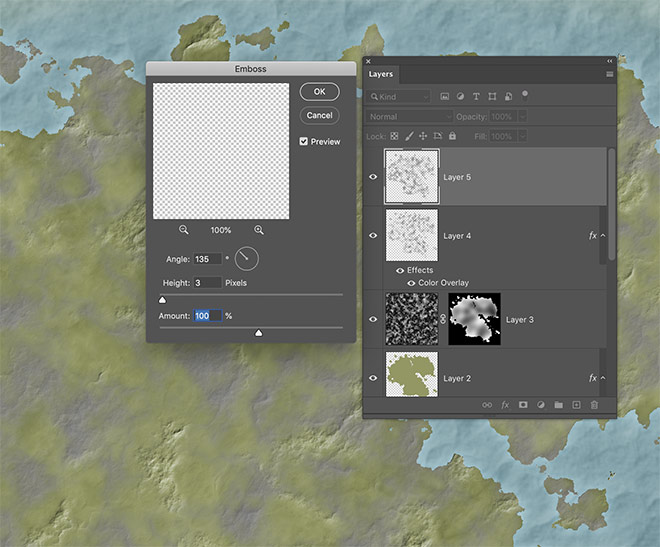
Go to Filter > Stylize > Emboss. Reduce the height value to 3px, but max out the Amount to 500% to generate mountain ranges across the world.
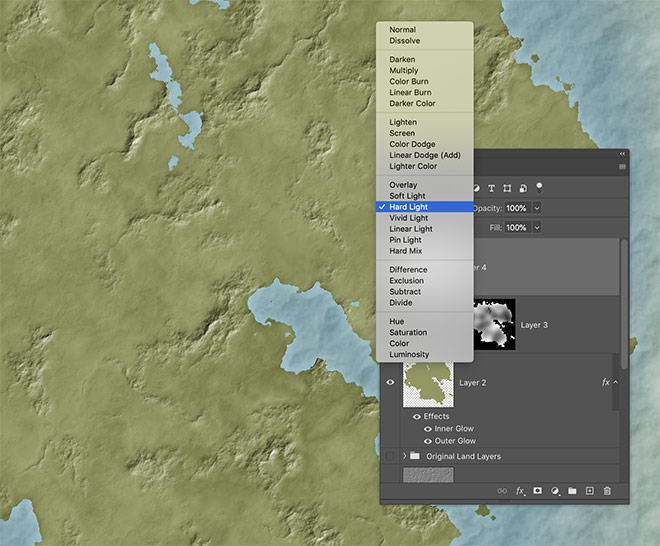
Change the blending mode of the mountains layer to Hard Light or Linear Light, depending how mountainous you want your mountains to be!
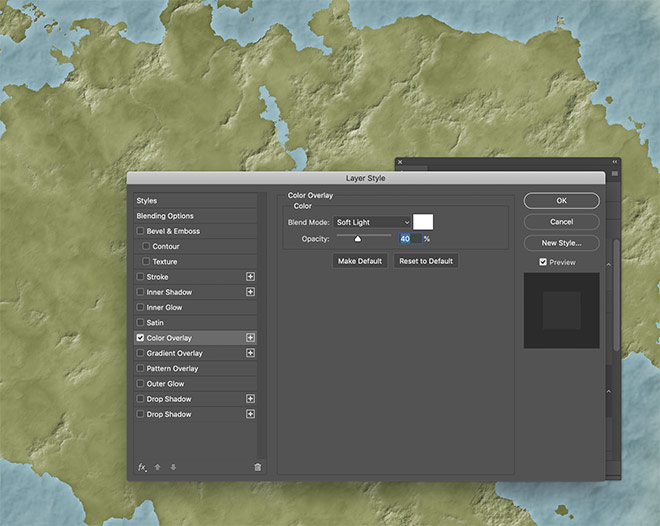
Double-click the mountains layer and add a Color Overlay. Set the Blend Mode to Soft Light with white, then reduce the opacity to 40%. This white overlay gives the appearance of snow-capped peaks.

Add another new layer with the Clouds and Difference Clouds filters. Use the Select > Color Range menu again to make a selection with the same values. Hit Backspace to delete the background of the clouds.
Inverse the selection, then delete the excess, leaving the clouds only over the land area.
Apply a Filter > Stylize > Emboss effect again, this time set the Amount to 100% with 3px Height.
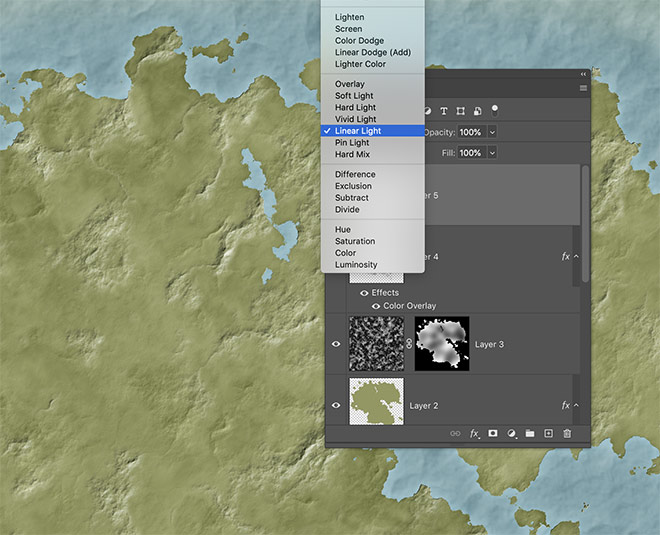
Change the blending mode of this layer to Linear Light to add more terrain effects to the landscape.
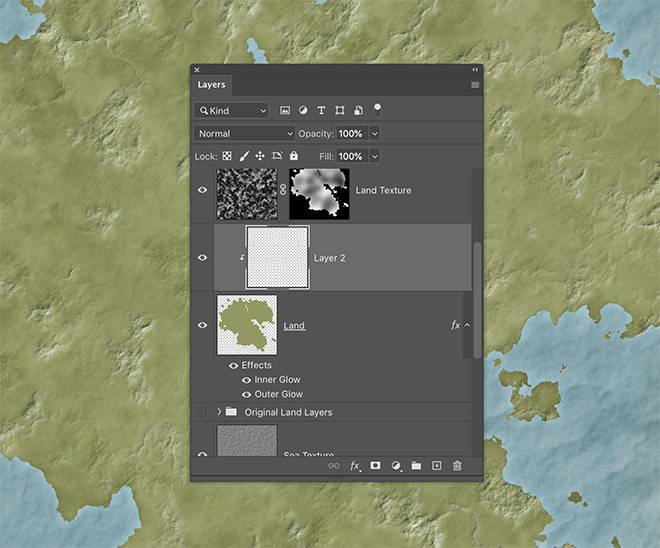
Add a new layer and drag it into position above the land layer. Hold the ALT key and click between the layers to form a Clipping Mask.
Set up the Brush tool with a sandy brown of #CAB88F. Paint over the land to form beaches and deserts.
Change the foreground colour to white and paint in snowy areas.
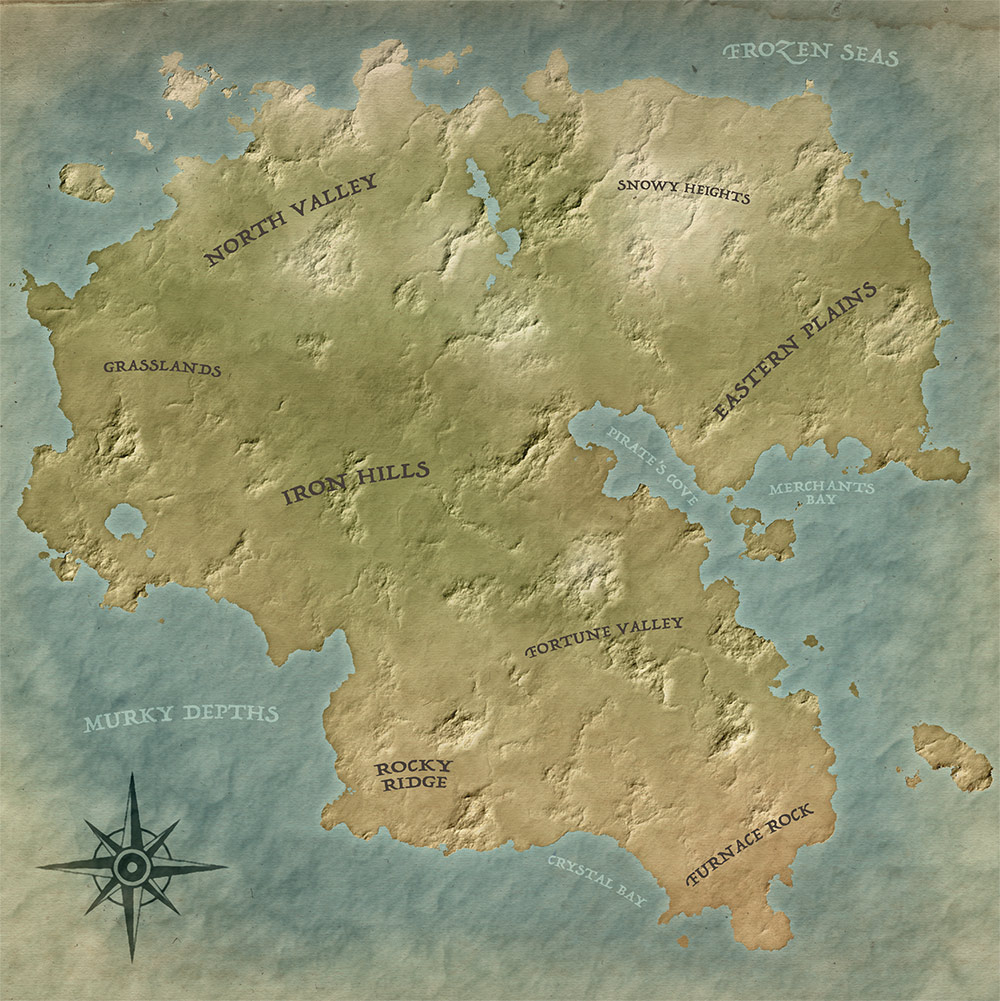
To create more of an aged map look, overlay a old paper texture. Here I’m using an image from the Vintage Paper Book Cover Bundle with the blending mode set to Multiply, and Opacity reduced to 80%.
As a finishing touch, you could add some labels to your fictional map. I used a font in my collection named Trattatello. Using a lighter shade of hue for labels over the sea, and a darker earthy tone for labels on land helps them to blend in.


Thanks for this sublime tutorial Chris. One question: the mountainpeaks look like valleys because the peaks are dark,which mostly presume lower heights or rivers. Perhaps somewhere in the layers should some be inverted?
At the mountain creation step where you create the color overlay style, add a “Bevel & Emboss” style, making the highlight and shadow both a light color, and play with the “Contour” and “Texture” as well, trying different light effects (Linear Light, Pin Light, Hard Light, etc.) to get a raised effect.
Also, in the instructions I just mentioned, try reversing the direction of the light for just the contour &/or texture effects.
I don’t know when I would ever use this, but it looks really really cool. Maybe someday I will make a world. Thanks for sharing this.
I did the map tutorial…still boggles my mind how anyone figures out how to layer the steps to create these effects…turned out amazing and piqued my curiosity to try other masks, blends and push the envelope…thanks to Chris!!!
Oh, wow! Thank you!
Where do you come up with these creative ideas???
Amazing… Thank you!