


Today, we will be learning how to create a Star Wars Tatooine travel poster in Photoshop using simple photo compositing techniques! The many Tatooine appearances in Star Wars and The Mandalorian make it the perfect desert vacation spot, as well as the perfect subject for some Mandalorian Photoshop fan art. Part of the Mandalorian series does take place on Tatooine after all, so its vast sandy hills deserve to be featured!
What You'll Learn in This Adobe Photoshop Tutorial
- How to create a Tatooine background
- How to create a Star Wars Tatooine sunset
- How to create a Tatooine desert landscape
- How to create a color grade with Tatooine appearances
- How to create a Mandalorian-inspired Photoshop poster
- How many suns does Tatooine have?
Follow along with us over on our Envato Tuts+ YouTube channel:
What You'll Need
To complete this project, you will need the following resources:
- Sand Dunes in Desert Landscape
- Desert
- Desert Sunset
- Sun Eclipse View
- Fonseca Rounded Font
- Pathways Font
- Rocket & Spaceship Silhouettes
- White Crumpled Kraft Paper Texture
- Kraft Paper Texture
Find more resources on Envato Elements!
1. How to Create a Tatooine Planet Landscape
Step 1
First, we are going to make a new canvas that is 2285 by 3386 pixels.
The ratio is more important than the size, so if you’d like it to be larger or smaller, feel free! Just keep the same ratio.
Step 2
Next, we are going to drag and drop our base landscape onto the canvas. This landscape contains our first sun and the start of our sky!


Step 3
Now, let’s do some quick color correction using Image > Adjustments > Hue/Saturation. Set the Hue to -4 and the Saturation to +27. This will punch up the colors and bring more red into our sky.
I always recommend using Smart Objects, so you can come back later and make adjustments as needed. You can create a Smart Object by right-clicking > Convert to Smart Object.


Step 4
Let’s prep the sky by adding a layer mask to the desert and feathering out the top harsh edge using a soft large round Brush.


Step 5
Now, we can bring in more sand dunes by dropping in a second desert landscape.
Extract the sky using your preferred method! I like using the Object Selection tool to create an initial selection and mask, and then refining that mask using Refine Edge.
If possible, try to align the two landscapes so that it looks as if the hills of sand are somewhat connected.


Step 6
Now, some color correction to match the two landscapes! First, a Brightness/Contrast adjustment set to Brightness -127 and Contrast 46.


Step 7
Next, a clipped black to white Gradient Map adjustment layer set to 22% Opacity.


Step 8
And lastly, a clipped Selective Color adjustment layer affecting the Reds, Yellows, and Blacks.


Step 9
We are going to drag, drop, and extract one more desert landscape onto the canvas. As these dunes are closest to the front of the image, they should be the largest.


Step 10
We are going to color correct the final set of dunes using Image > Adjustments > Brightness/Contrast again, setting the Contrast to 65.
We can Group our final sandy hills together, naming the group “Sand.”


2. How to Create a Tatooine Sunset
Step 1
Our first step to making a Tatooine sunset is to elongate our sky!
We are going to do this by duplicating our first desert landscape, the image containing the sun, bringing it below all other layers and out of the “Sand Group” and then enlarging it significantly.
Place it so that it looks like a natural continuation of the existing sky by paying attention to the clouds and texture of the original sky.


Step 2
Now, add a quick Filter > Blur Gallery > Field Blur set to a Blur of 24 px.


Step 3
And then a Hue/Saturation setting of Hue -7 and Saturation +33.


Step 4
But how many suns does Tatooine have? Two, of course! To get the iconic double Tatooine suns, we are going to use the sun from our third desert landscape.
Using the Elliptical Marquee tool, create a circle selection around the sun, and then add a Layer Mask to mask everything but the sun out.


Step 5
Set the sun’s layer to Lighten, and then using Brightness/Contrast make any final adjustments. You can do things like making the sun brighter or removing any leftover background.


Step 6
To finish off the Tatooine suns, let’s drop in a lens flare and set it to Screen. No Star Wars Photoshop fan art is complete without some classic sci-fi lens flares!


Step 7
Now, let’s create a circle selection around the lens flare using the Elliptical Marquee Tool with a Feather of 20 px.
Add a Layer Mask to mask the lens flare.


Step 8
Finish up by applying a Brightness/Contrast of -150 Brightness and 100 Contrast to the lens flare.
You can also set the lens flare to around 50% Opacity for a subtler look!


Step 9
Duplicate your new lens flare and add it to the second sun!
That will finish up our Star Wars Tatooine sunset.


3. How to Create a Tatooine Desert Color Grade
Now, let’s finish our Tatooine planet with a desert-inspired color grade.
We will be punishing up the reds and oranges as well as adding some contrast using just four Color Lookup layers.
Step 1
First, add a Color Lookup layer set to Crisp Warm and an Opacity of 16%.


Step 2
Second, a Color Lookup layer set to Edgy Amber and an Opacity of 15%.


Step 3
Third, a Color Lookup layer set to Fuji 2393 and an Opacity of 22%.


Step 4
And finally, a Color Lookup layer set to Late Sunset and an Opacity of 26%.
Group all of your color lookup layers together, naming that group “CG” or “Color Grade.”


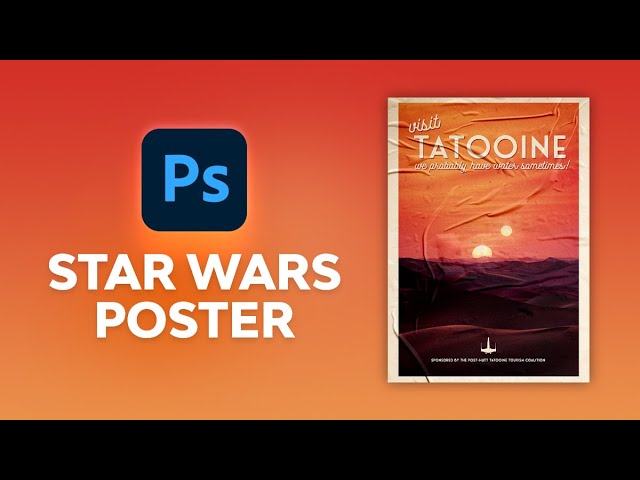
4. How to Create a Travel Tatooine Poster
Next, let’s turn this Tatooine desert landscape into a proper Tatooine poster!
Step 1
Let’s add a border using the Rectangle Tool, placing it above the "Color Grade" group. Set the Inner Fill to None and the Stroke to a light cream #fff2dc color, with a thickness of around 150 px.


Step 2
Now, let’s add “Tatooine,” nice and large, to the top of the poster using the Type Tool and the font Fonseca Rounded.
Add a “Sponsored by” message towards the bottom of the poster in a significantly smaller size. For the text, I am also using the same cream #f6e5ce color that was used for the border.


Step 3
Next, add “Visit” directly above “Tatooine“ and a fun slogan directly below it using the Pathways font.
I went with the slogan “We probably have water sometimes!” and also slightly tilted the “Visit” using the Move Tool.
Group all of the text layers together, naming the group “Text.”


Step 4
Now, we can add a Drop Shadow Layer Style to the whole group.
Set the Drop Shadow to a Blend Mode: Multiply, a burnt orange #7d3419 color, a 50% Opacity, a 124 Angle, and a Distance of 12.


Step 5
Lastly, add a small Star Wars-inspired icon right above the “sponsored by” message. Fill the icon with the same cream #f6e5ce color as the text and border.


5. How to Add a Paper Texture to a Poster
Let’s finish this Star Wars Photoshop fan art up by adding two different paper textures!
Step 1
First, a texture with subtle folds and wrinkles, to help give a touch of depth to the poster. Set the texture to Multiply and 76% Opacity.


Step 2
And finally, add a paper-like texture to add some smaller details and give the poster a withered or vintage vibe. We will be setting that texture to Multiply with an Opacity of around 45%.


We Are Done!
And that's all there is to creating a Star Wars Tatooine background in Photoshop! But don't stop here—you can make any of the countless iconic Star Wars backgrounds in Photoshop! Or even make some amazing Mandalorian Photoshop fan art, as part of the Mandalorian series does take place on Tatooine, with your new Tatooine sunset creating skills.


Looking to learn even more? Check out some more tutorials below:


