


In the following steps, you'll learn how to create a mountain rescue unit vector badge in Adobe Illustrator. For starters, you'll learn how to set up a simple grid and how to create the main badge shape. Using basic vector shape-building techniques and some warp effects, you'll learn how to create the rest of the shapes.
Moving on, you'll learn how to add some subtle shading and a flat background. Finally, you'll learn how to add text and how to easily bend it for your Himalaya logo design.
For more inspiration on how to adjust or improve your final badge logo design, you can find plenty of resources at GraphicRiver. Or you can find a customizable emblem shield logo from Envato Elements.


1. How to Create a New Document and Set Up Grid
Hit Control-N to make a new document to create your emblem logo. Select Pixels from the Units drop-down menu, enter 850 in the width and height boxes, and then click that More Settings button. Select RGB for the Color Mode, set the Raster Effects to Screen (72 ppi), and then Create Document.
Enable the Grid (View > Show Grid) and the Snap to Grid (View > Snap to Grid). You'll need a grid every 5 px, so simply go to Edit > Preferences > Guides & Grid, and enter 5 in the Gridline every box and 1 in the Subdivisions box. Try not to get discouraged by all that grid—it will make your work easier, and keep in mind that you can easily enable or disable it using the Control-" keyboard shortcut.
You can learn more about Illustrator's grid system in this short tutorial from Andrei Stefan: Understanding Adobe Illustrator's Grid System.
You should also open the Info panel (Window > Info) for a live preview of your emblem logo design with the size and position of your shapes. Don't forget to set the unit of measurement to pixels from Edit > Preferences > Units. All these options will significantly increase your work speed.


2. How to Create the Main Shape
Step 1
Pick the Ellipse Tool (L) and focus on your toolbar. Remove the color from the stroke and then select the fill and set its color to R=87 G=158 B=214.
Move to your artboard and simply create a 310 x 70 px shape—the grid and the Snap to Grid should make it easier. This is the start of the main shape you'll need to create the emblem logo.


Step 2
Pick the Rectangle Tool (M), create a 310 x 255 px shape, and place it as shown in the first image. Make sure that it stays selected and go to Object > Path > Add Anchor Points.
Switch to the Direct Selection Tool (A), select the anchor point highlighted in the first image, and drag it 115 px down as shown in the second image.


Step 3
Select both shapes made so far for the Himalaya logo design. Open the Pathfinder panel (Window > Pathfinder), and click the Unite button.


Step 4
Make sure that your shape is still selected and go to Effect > Stylize > Rounded Corners. Enter a 25 px Radius, click OK, and then go to Object > Expand Appearance.


3. How to Create the Smaller Shapes
Step 1
Make sure that your blue shape is still selected and go to Object > Path > Offset Path. Enter a 25 px Offset and click OK. Fill the resulting shape of the mountain rescue badge with red. Don't forget to send it to the back with Shift-Control-[.
Reselect your blue shape and go again to Object > Path > Offset Path. This time, enter a -15 px Offset and click OK. Fill the resulting shape of the mountain rescue badge with yellow.


Step 2
Select your red and yellow shapes and click the Minus Front button from the Pathfinder panel.


Step 3
Using the Rectangle Tool (M), create a 200 x 100 px shape and place it as shown in the first image. Select this rectangle along with the red shape and click the Intersect button from the Pathfinder panel. Fill the resulting shape with R=246 G=40 B=17.


Step 4
Select your blue shape and go to Object > Path > Offset Path. Enter a -15 px Offset, click OK, and fill the resulting shape with R=32 G=43 B=63.


Step 5
Using the Rectangle Tool (M), create a 320 x 155 px shape and place it as shown in the first image. Select this new rectangle along with the darker blue shape and click the Intersect button from the Pathfinder panel. Make sure that the resulting shape is filled with R=32 G=43 B=63.


Step 6
Pick the Rectangle Tool (M) and create a 360 x 85 px shape. Fill this part of the mountain rescue patch with R=246 G=40 B=17 and place it as shown in the following image.


4. How to Create the Mountains
Step 1
Using the Pen Tool (P), create a sharp mountain outline roughly as shown in the following image. Once you're done, fill this shape with R=248 G=232 B=217.


Step 2
Pick the Ellipse Tool (L), create a 50 px circle and place it as shown in the first image. Select your mountain shape and go to Object > Path > Offset Path. Enter a 5 px Offset, click OK, and bring the resulting shape to the front (Shift-Control-]).
Select both shapes made in this step and click the Minus Front button from the Pathfinder panel. Fill the resulting shape with R=248 G=232 B=217.


Step 3
Using the Pen Tool (P), create several sharp shapes as shown in the first image. Fill them all with R=153 G=196 B=230.


5. How to Create the Bent Shapes
Step 1
Select your red rectangle and go to Effect > Warp > Arch. Enter the attributes shown below, click OK, and then go to Object > Expand Appearance.


Step 2
Pick the Rectangle Tool (M) and create a 360 x 85 px shape. Fill it with R=32 G=43 B=63, place it as shown in the first image, and then go to Effect > Warp > Arch. Enter the attributes shown below and click OK. Expand your selection (Object > Expand Appearance) and then send it to the back (Shift-Control-[) .


6. How to Add Strokes, Shading, and a Background
Step 1
Select your blue shape and focus on the Appearance panel (Window > Appearance). Select the stroke, set the color to R=248 G=232 B=217, and then open the Stroke fly-out panel. Increase the Weight to 15 px and check the Align Stroke to Inside button.


Step 2
Make sure that your blue shape is still selected and keep focusing on the Appearance panel. Add a second stroke using the Add New Stroke button and select it. Set the color to R=32 G=43 B=63 and the Weight to 10 px.


Step 3
Select all the shapes made so far and add copies in front (Control-C > Control-F). Make sure that only these copies are selected and click the Unite button from the Pathfinder panel.
Send the resulting shape to back (Shift-Control-[) and focus on the Appearance panel. Select the fill, set the color to R=32 G=43 B=63 and lower its Opacity to 15%, and then go to Effect > Path > Offset Path. Enter a -30 px Offset, click OK, and then go to Effect > Distort & Transform > Transform. Enter the attributes shown below, click OK, and then go to Effect > Blur > Gaussian Blur. Enter a 20 px Radius and click OK.


Step 4
Pick the Rectangle Tool (M) and create an 860 px square. Fill it with R=248 G=232 B=217, make sure that it covers your entire artboard, and don't forget to send it to the back (Shift-Control-[).


7. How to Add Text
Step 1
Now let's work on the text of our Himalaya logo design. Pick the Type Tool (T) and open the Character panel (Window > Type > Character). Select the Balatype font and set the size to 70 px.
Simply click on your artboard and add the "HIMALAYA" piece of text. Place it as shown in the following image and set the color to R=248 G=232 B=217.


Step 2
Make sure that your piece of text is still selected and go to Effect > Warp > Arch. Enter the attributes shown below and then click OK.


Step 3
Pick the Type Tool (T) and focus on the Character panel. Use the same font and set the size to 35 px.
Add the "RESCUE UNIT" text and set its color to R=248 G=232 B=217. Place this new piece of text as shown in the following image and go to Effect > Warp > Arch. Enter the attributes shown below and then click OK.


Step 4
Pick the Type Tool (T), add the "EVEREST" piece of text, and set its color to R=248 G=232 B=217. Place this new piece of text as shown in the following image and go to Effect > Warp > Arch. Enter the attributes shown below and then click OK.


Step 5
Pick the Type Tool (T) and focus on the Character panel. Use the same font and set the size to 100 px. Add a little "+", set the color to R=248 G=232 B=217, and place it as shown in the first image.
Return to the Character panel and set the size to 30 px. Add the "19" and the "69" pieces of text and place them as shown in the last two images.


8. How to Add Some Fir Trees
Finally, download the attachment from this tutorial: How to Create a Wintry, Snow Background in Adobe Illustrator. Open that christmas tree.ai document and copy the shape inside your badge document.
Change the fill color to R=32 G=43 B=63 and then create about seven copies. Spread these copies roughly as shown in the first image and then send them behind that red shape.


Congratulations! You're Done!
Here is how the completed badge design should look. The results can be used for a Himalaya logo design or mountain rescue patch. I hope you've enjoyed this tutorial on how to create your own badge and can apply these techniques in your future projects. Don't hesitate to share your final result in the comments section.
Feel free to adjust the final design and make it your own. You can find some great sources of inspiration at GraphicRiver, with interesting solutions to improve your design.


Find Premade Badge Logo Design Templates From Envato Elements
Learning how to create your own emblem is never a waste of time. But if you're feeling the crunch, finding a badge logo template is a quicker alternative to starting from scratch. If cool emblem templates are what you're after, check out a few of these options below.
1. Butchery Emblem Shield Logo (AI, PSD, EPS, JPG)
This butcher-themed emblem logo design brings the vintage look into the modern age. Its design is professional, and the organized layers make customization easy. Choose from a full-color or black and white option to make the perfect emblem shield logo for you.


2. Cosmic Badge Logo Design Templates (AI, EPS, JPG)
If you want to create a badge in Illustrator that shoots for the stars, choose these cosmic options. This bundle includes six badge logo designs with unique styles. Open them up and tweak them to create your own badge with different colors and looks.


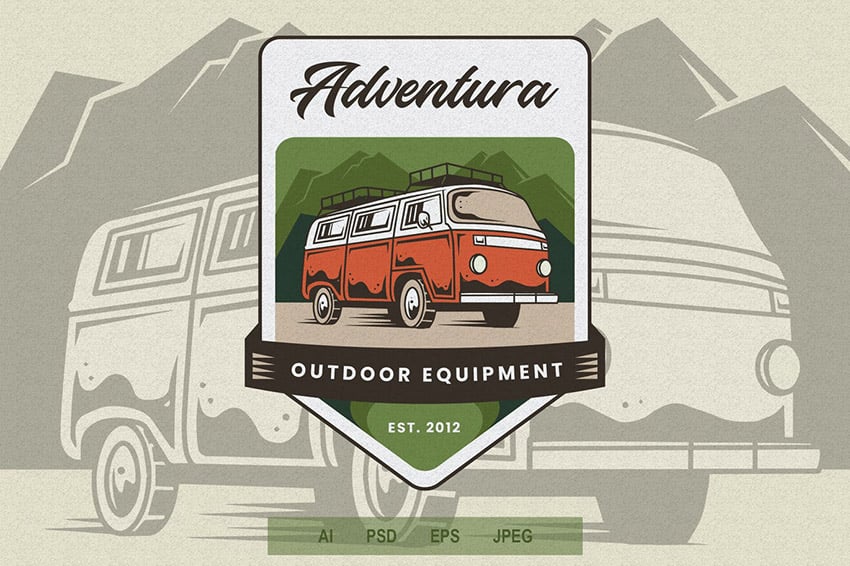
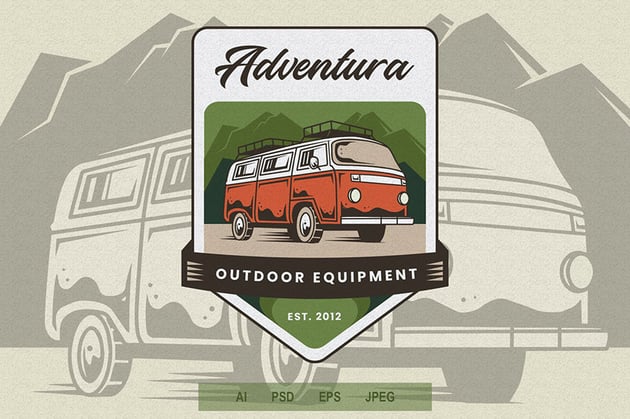
3. Adventure Emblem Logo Design (AI, PSD, EPS, JPG)
The great outdoors is the perfect backdrop for this adventure-themed emblem template. It comes with vintage style and excellent typography (font download links are included)! Just choose your colors and text to get this resizable emblem shield logo ready for your projects.
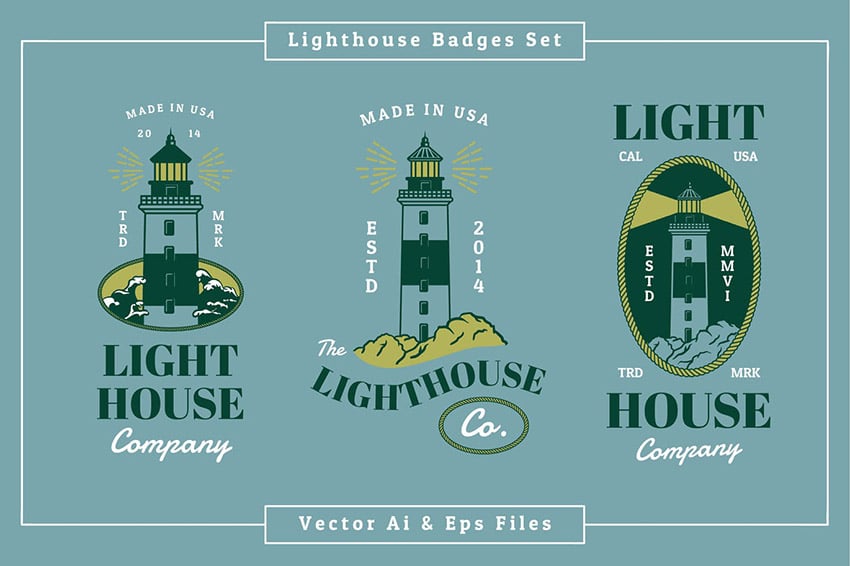
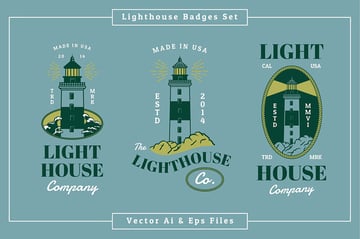
4. Lighthouse Badge Logo Design Templates (AI, EPS)
Do you want a badge design template that keeps the sea in mind? Then you'll love this classic lighthouse look. It comes with three different badge logo designs with unique styles. Each file is a vector, letting you create your own badge in Illustrator for many project sizes.

5. Farming Emblem Template (AI, PSD, EPS, JPG)
We round out our list with this old-school farming emblem shield logo. It features an easy-to-understand design with a tractor graphic. Quickly edit the text and date on the banner for a unique badge. It's a great option if you're looking to create a logo from an emblem template.


Conclusion
It feels pretty good to finally learn how to create your own emblem from scratch, doesn't it? If you want to find even more resources on emblems, badges, and logos, Envato Tuts+ has your back! Check out these tutorials and articles our team of instructors has made just for you.

 The Different Types of Logo (With Design Ideas)


 How to Design Your Own Gaming Clan Logo

 How to Create a Retro Vintage Badge in Adobe Photoshop

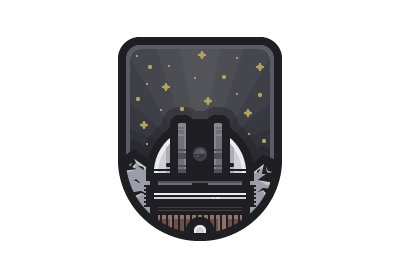
 How to Create a Space Observatory Badge in Adobe Illustrator


 How to Create a Gold Foil Logo Mockup in Adobe Photoshop


 How to Create Banner, Label and Badge Templates in Illustrator


